Registration Action
In registration action, a Status field has two option, rejected and allotted.
Rejected: Select rejected and enter the details in remark and click ‘Save’.
Allotted: Select Allotted and enter the details, of required fields, which are as follows,
Admission number: The Admission number has two fields, first box is Prefix and Second box is the number field. These are automatically detected. And the setting of Prefix and number of digits in number box, should be done initially. Please refer, Student Module Configuration.
Note: If you are maintaining different Admission Prefix for different courses,
For
ex: Java: Prefix J and number - J0001
Artificial Intelligence: AI and number – AI0001,
And in the student module configuration you have saved AI as default prefix, then don’t forgot to change, the admission prefix and admission number while allotting the student, as AI prefix and number will be automatically populated every time. Just enter J in Prefix box and the next available admission number will be auto detected and showed.
Note: Maintaining two Prefix help you to enrol/assign one student for two different subjects/courses/classes/batches.
Batch: Select the batch from the drop down list as required and below the box current strength of student of the batch/class is displayed.
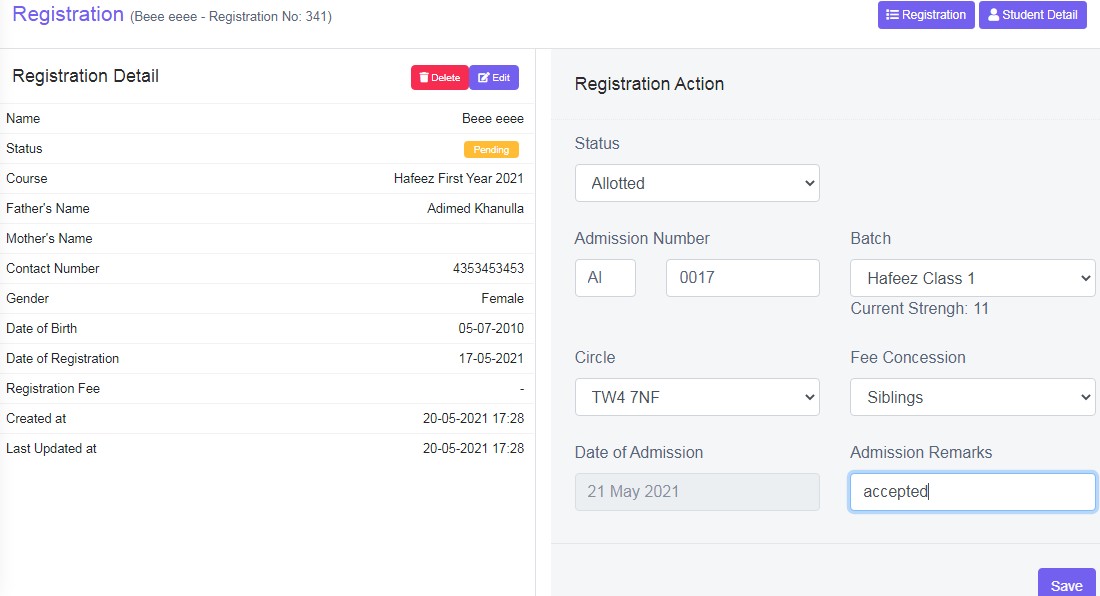
Figure 21
Circle:If the student agreed for transportation of the school, then select the circle of the transportation from the drop down list. Please refer Finance – Transportation Fee Main module to setup circle and for more details.
Fee Concession: If you want to provide any fee concession for the student, ex: Employee Discount, Siblings Discount etc, select from the drop down list. To setup fee concession refer, Finance – Fee Concession, main module.
Date of Admission: Select the date of admission.
Admission Remarks: Enter the remarks as required.
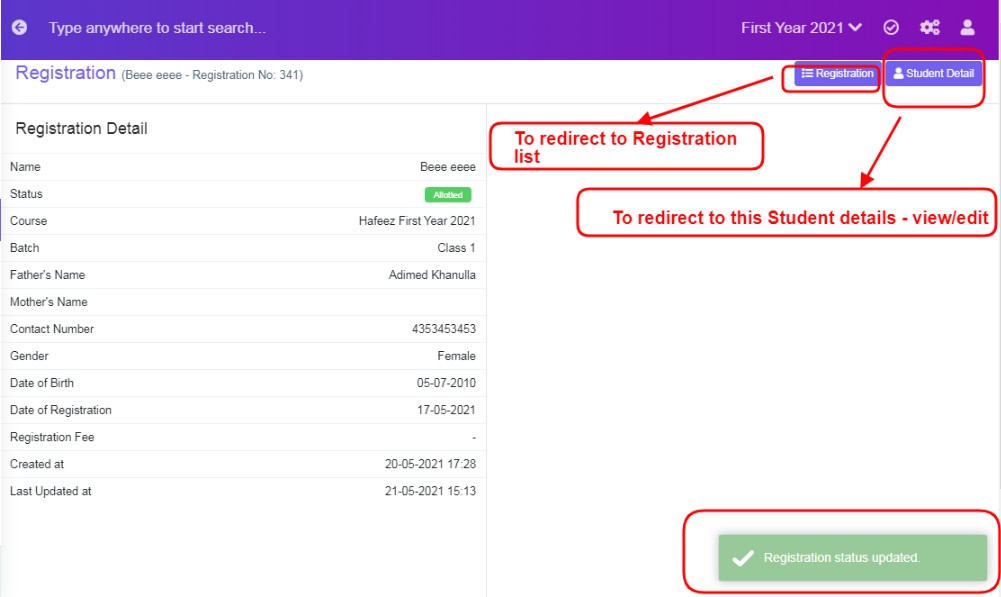
Figure 22
Once the data has entered in the required fields, click ‘Save’. A green pop up message will be displayed at right hand side as, “Registration Status Updated”.
Click the tab Registration to go back to the registration list, or Click the Student Detail, to view/edit the student of the page.
Note: The students who are enrolled/allotted either through online or offline registration form, will be listed in this registration tab. Once their status is changed from pending to allotted will be list in registration tab as well as in Student list tab.
Bulk Allotment:
If in card view, click on List view tab  , You can use filter and sort by options to refine search results, and select/tick the boxes to the left hand side – first column, and then click Bulk Allotment
  tab, scroll the screen to bottom, if required, a Registration Action section will be displayed at the bottom of the screen.

Figure 23
Select Status as Allotted from the drop down list and select the batch and if these students belong to same circle of transportation select the circle and if fee concession is given to all, then select the required concession, if not, select no transport circle or fee concession and then click ‘Save’. The number of student selected/ticked is three, so three times a green pop up will be displayed on the right hand side of the screen, as “Registration Status Updated”.