Registration
- Registration
Add New Registration
Forms Field Description
List View
Data Table View Description
Pay Registration Fee Fields Description
In this module, you can register offline students manually, allocate (i.e. accept/reject) pending students either registered online and offline, filters, based on date of registration, siblings, distance can be used for allocation, can do bulk allotment to their respective classes, assign transport circles, provide concession of fee if required.
It lists all the students applied for admission in your institute/school, admit or reject students as per seat availability.
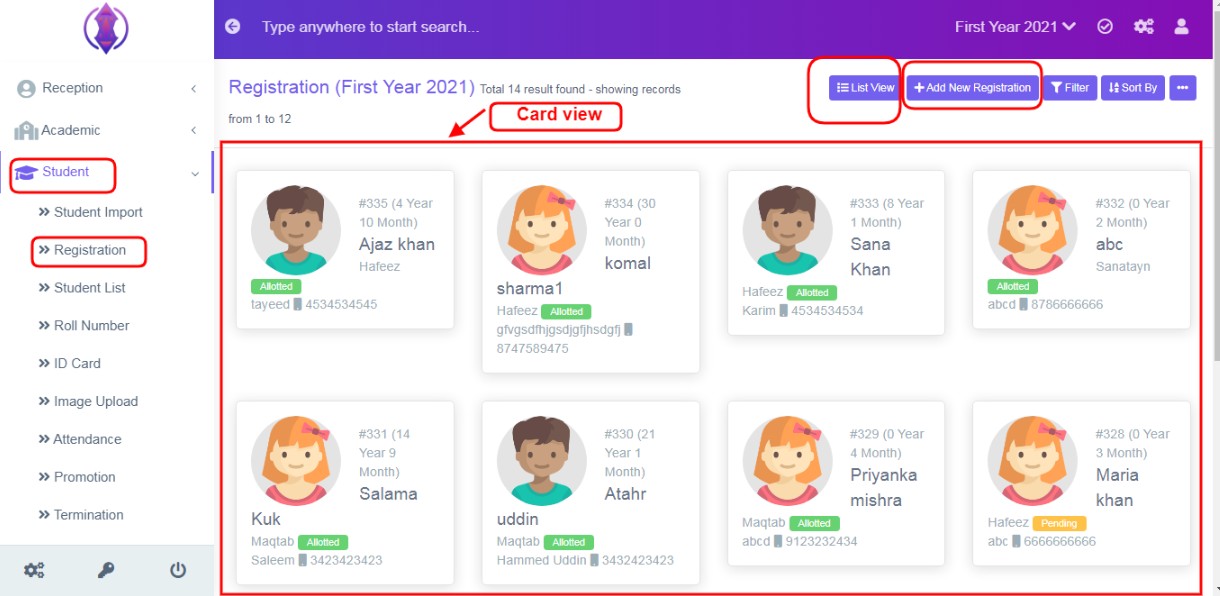
Figure 1
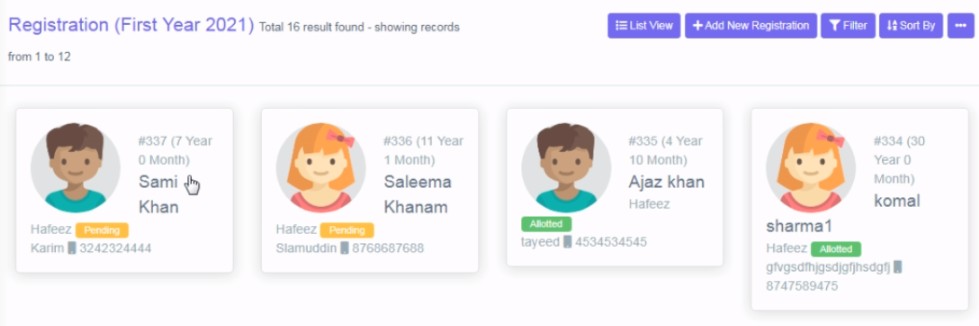
Click on Student tab and click on ‘Registration’ tab, refer figure:1 and you will be displayed with the students’ details in card view style/layout as default.
Card View: In Card view, list of students is displayed, with their registration number, age, name, course/class, enrolling/enrolled – status as Allotted/pending/rejected, their father name and contact number on their respective cards.
You can click on the card and change the pending status to either allocated or rejected. If you want to allot the students on the basis of priority, saved in students’ module configuration (Date of registration, Distance or siblings), then you have to click on List view tab.
In default view, which is card view, Page title bar contains three tabs, that is, List View, Add New Registration, Filter, Sort by and more dots options.
Add New Registration
This to use to enter records of students and enrol the students manually.
Ex: If someone has visited reception personally and enrolling a student, or you have received few paper application forms of student, from lead/marketer of the school, or parents who have no knowledge to use the internet and cannot fill the registration forms by themselves and in many other scenarios, where manually entering of students’ records is required, add new registration can be used.
Click on Add New Registration tab, a screen will be displayed, refer figure:2
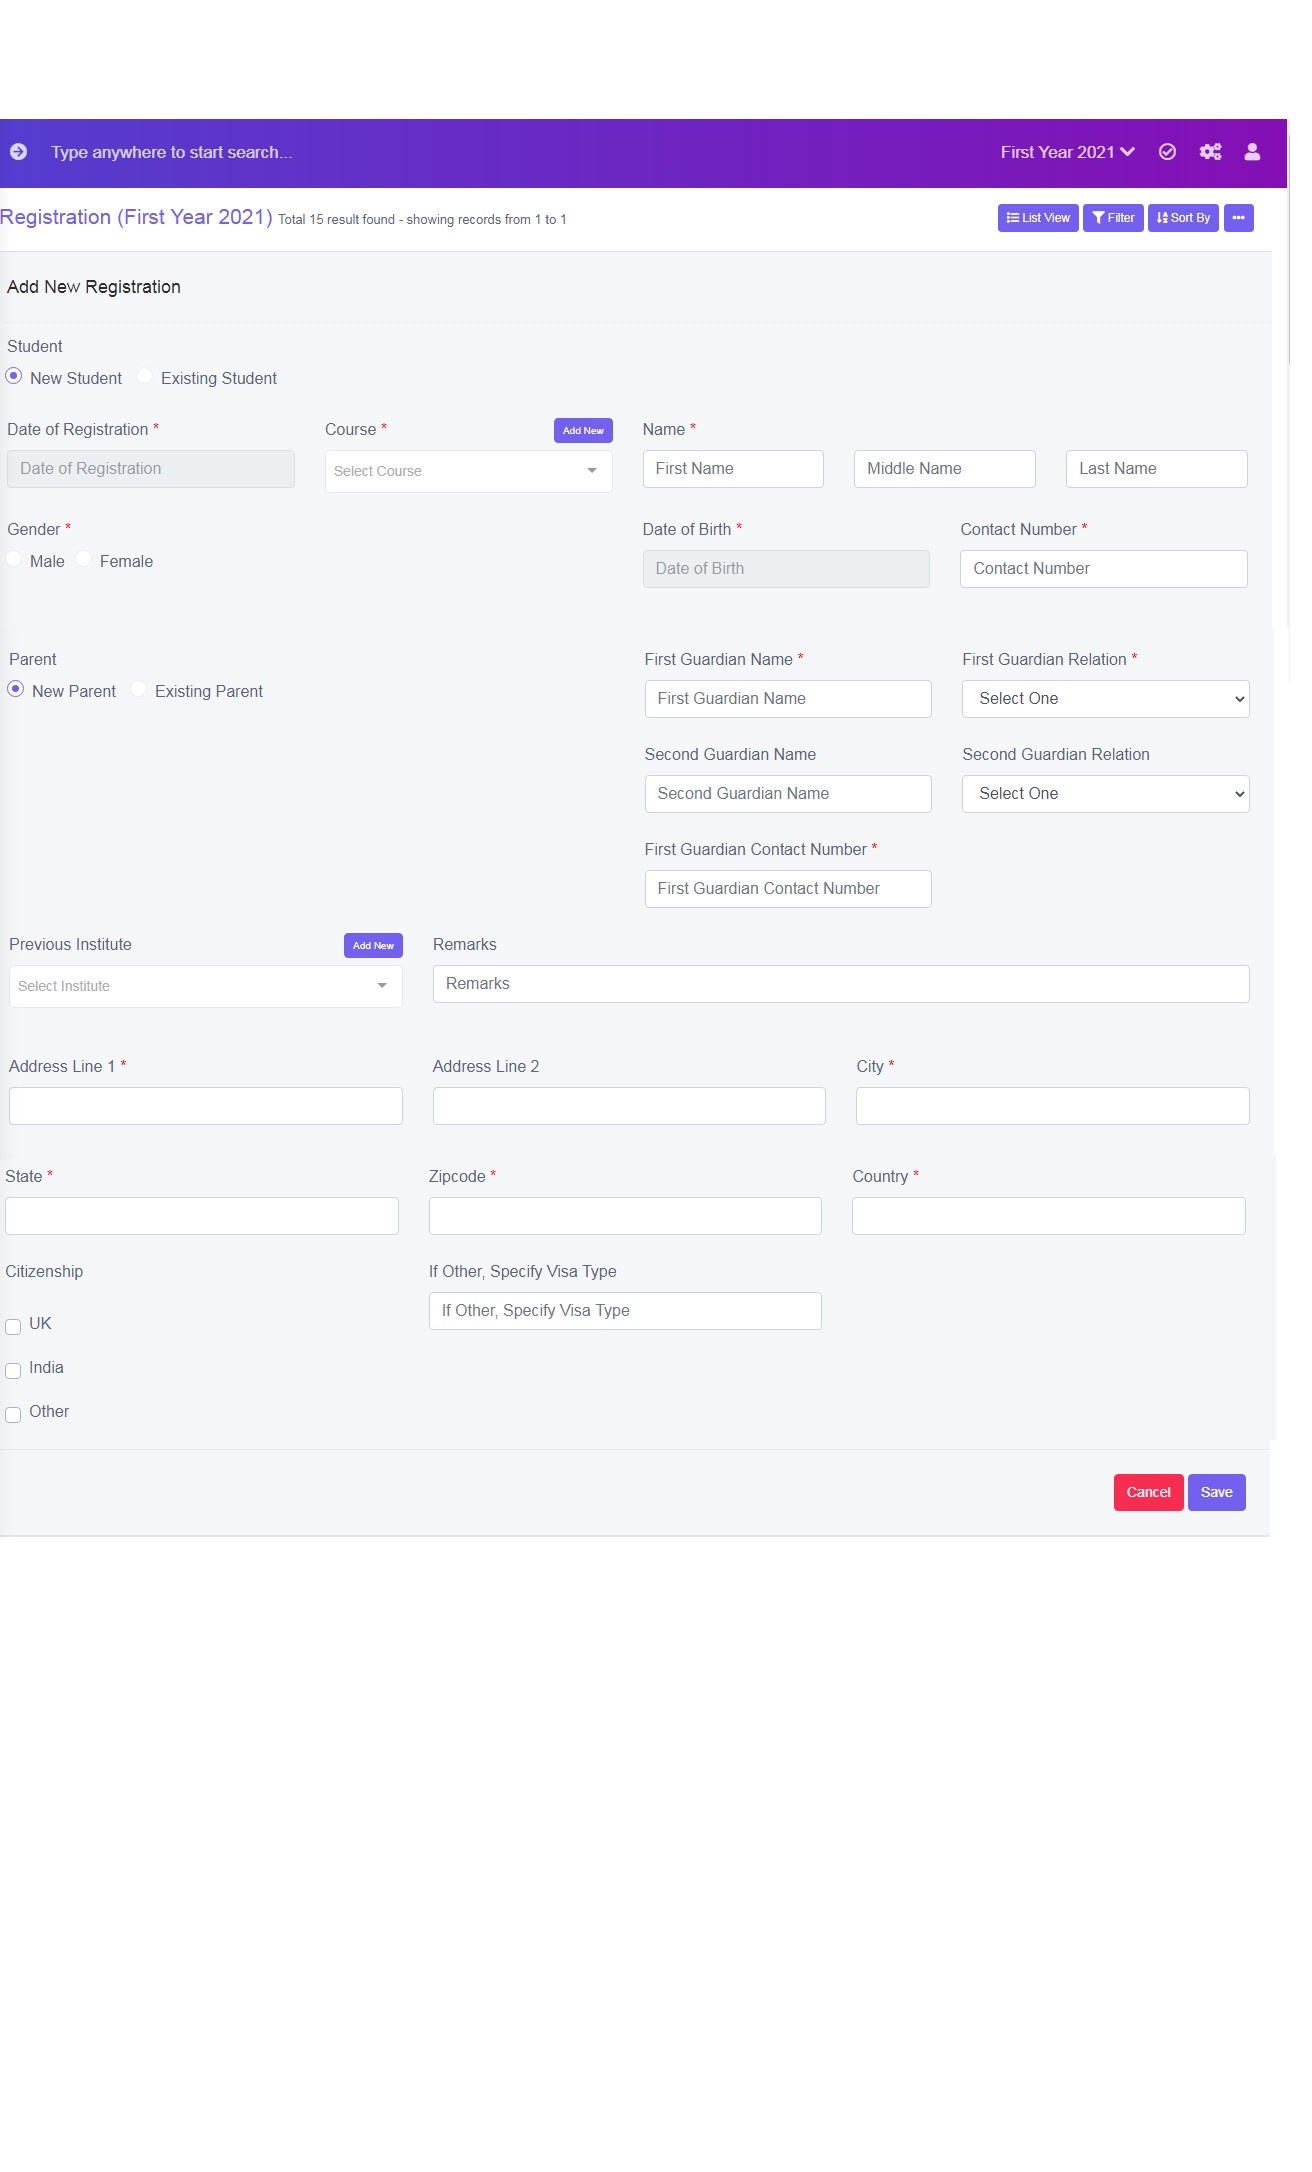
Figure 2
Forms Field Descriptions
Student: New Student or Existing Student.
New Student: Select new student, if you are enrolling a new student for a class/course/batch and fill all other required fields as displayed, refer figure:2.
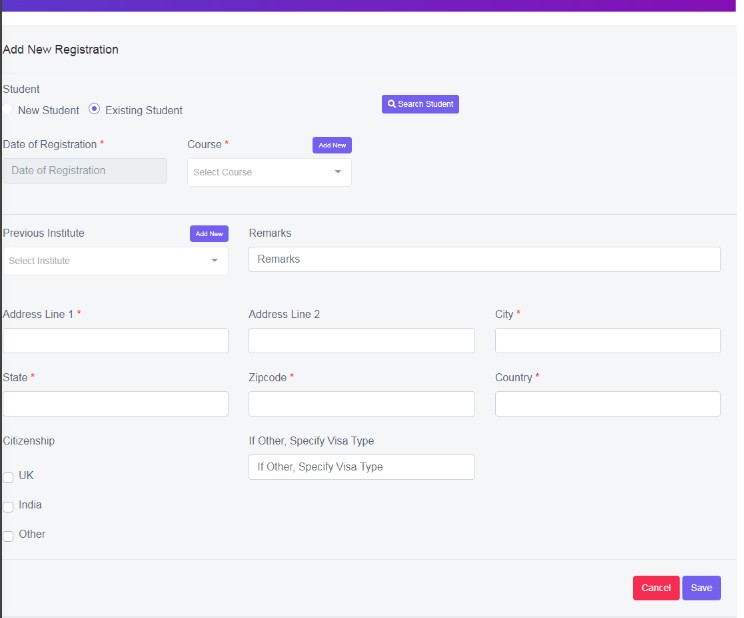
Figure 3
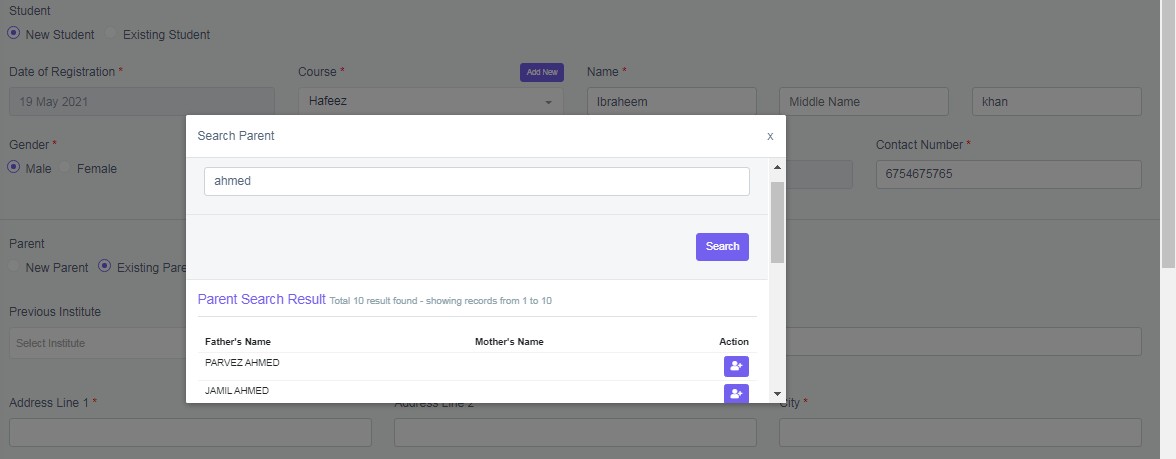
Existing Student: Select existing student, if an existing student is enrolling for more than one class/course/batches, in you school. If you select this Existing student, search student is need, and the form fields will start with search student record query, click on search student tab  . Refer figure:3.
A pop is displayed in the middle of the screen to enter name of student and perform search query, as
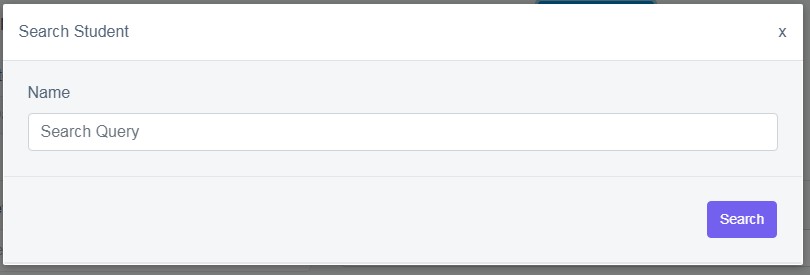
Figure 4


Enter the name of the student and select the student by click on the action button, icon  , a pop up is displayed asking for your confirmation, proceed with request?, you can click continue to proceed and enter existing student data or close to go back to search query box.
Student Name and Guardian name is shown to the right hand side, as confirmation either continue by entering the other form fields and save. If you want to remove the searched name , click remove student  .
.
Parent - Existing Parent: For New student registration, there is another feature, search existing parents, which helps you, to add a new student, as a sibling to the existing student.
Enter the other required data and click ‘Save’. A green pop up will be displayed at the right hand side of the screen as “Student Registration Completed”. And the student will be allotted to the pending status automatically.
Note: You can add more fields, to take more information/data from the parents/students, refer Custom Field user manual, in Module configuration.
Ex: Citizenship – Tick box, and If other specify, visa type – Text box – is added by using Custom Field.
List View
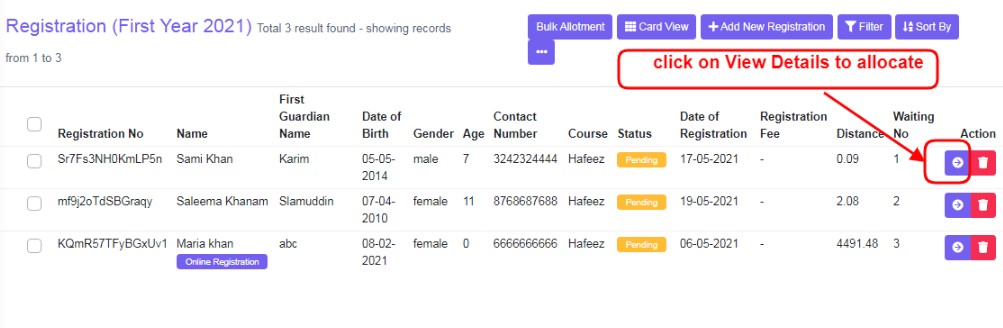
If you click on list view, which is on the page title bar, the card view will be changed to data table view and two more new tabs is displayed in title bar, it is, Bulk Allotment and Card View tabs.
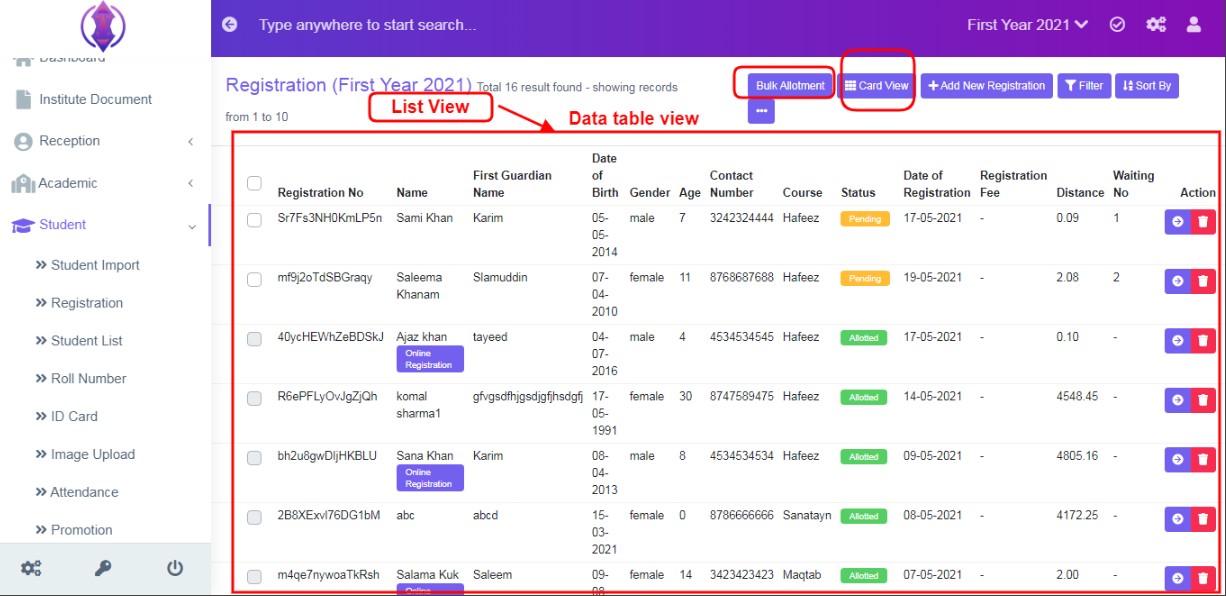
Click on list view and students will be listed in a data table column view, refer figure:2.
Data Table View Description
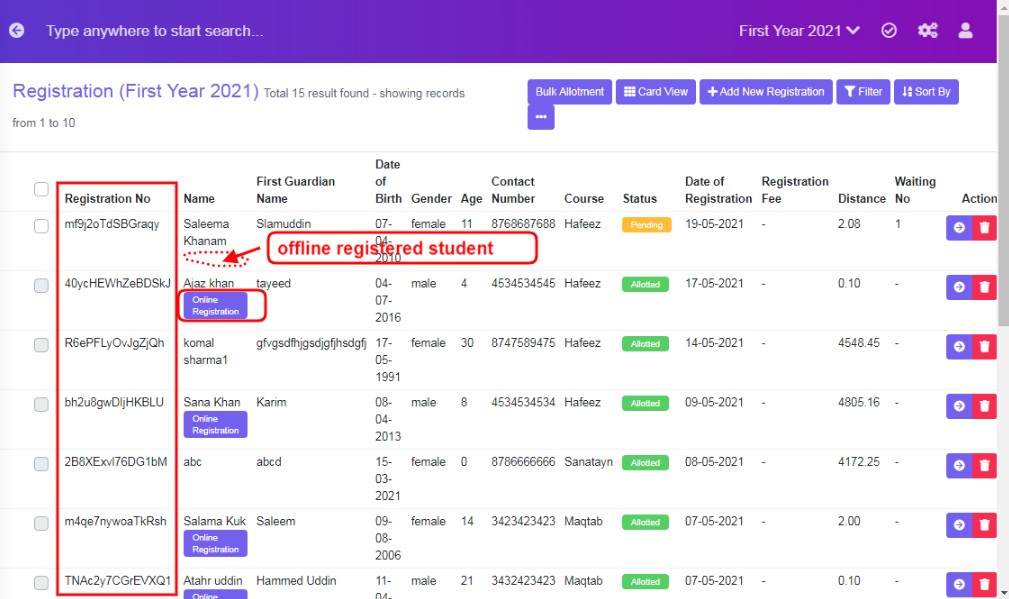
Registration No: These numbers are automatically assigned by system for both online and offline registered students. With this number, parents/students can check their status of waiting list on the public website.
To enable the waiting status, check feature on public website of your school, refer System Configuration user manual for more details.
Name: Name of the Student enrolled.
First Guardian Name: Name of the First Guardian of the student.
Date of Birth: Date of Birth of the student.
Gender: Gender of the student.
Age: Age of the Student.
Contact Number: Contact number of the student.
Course: Course or Class student opted/selected to enrol for.
Status: Three Student Pending, Allotted and Rejected is displayed.
Pending status is displayed, initially, once a student is registered whether online or offline.
Allotted status is displayed, once, you view the student details and change the status to pending to allotted. For more details, refer View Details of this registration module.
Rejected status, once, you view the student details and change the status to pending to rejected. For more details, refer View Details of this registration module.
Date of registration: For online registered students, the day when student submit the form will be the date of registration. For offline students, admin can select any date manually and save.
Registration Fee: If any registration fee is charged from the student, it is displayed here. To enable or disable a registration fee, please refer Course User Module.
Distance: The address details entered in online or offline registration form, calculates the distance, between the students’ resident to that of school location. Distance is calculated automatically by the system. It is calculated based on radius.
Waiting No: Waiting number is automatically assigned to students based on each course/class and based on priority selected in waiting list configuration. For Waiting list configuration, refer Student Configuration user manual.
If in class 1 or course 1, Distance is first priority, Siblings is second and Date of registration third priority and will given priorities as 1,2,3,4……automatically.
Same will be for class 2 or course 2, and will be given priority starting from 1,2,3,4….. automatically
You can use filters Course or Sort by option, refine your search results and view the waiting number list as required.
Allocating Student:
Either click on the card view of the student, or click on Action menu of ‘View details’, to allot the student.
Both views, will display the same screen as below, in order to edit details or allot the students.
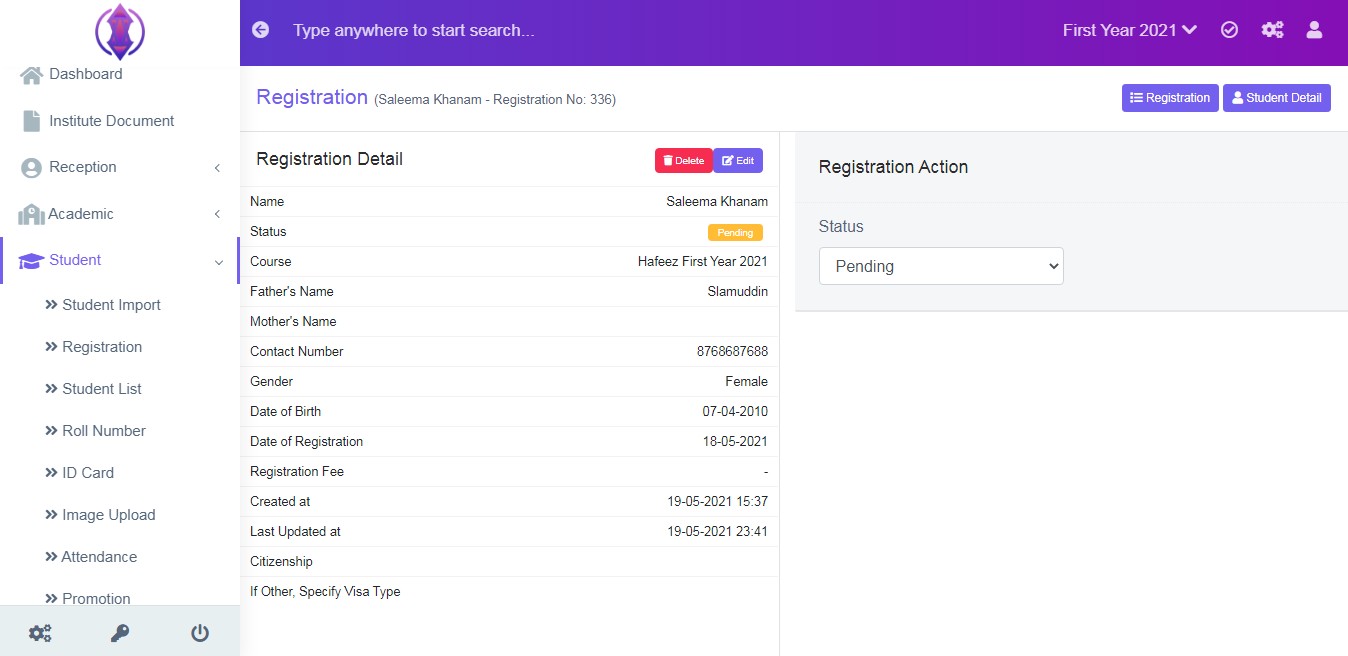
But if your course/class is charging registration fee, then you will not be displayed Registration Action instead, it will display pay registration fee amount, once the payment fee details are entered and saved and then it will display, Registration Actions. Refer figure:13

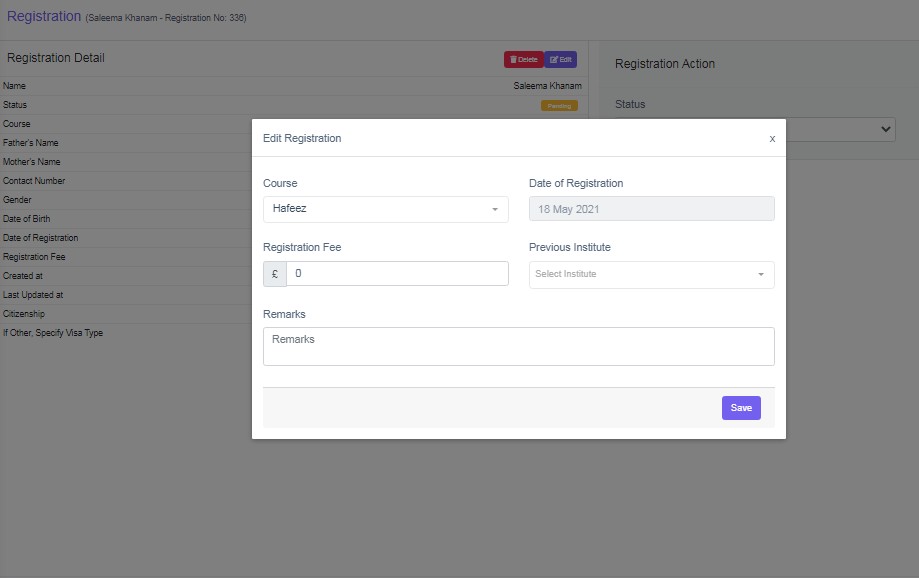
Edit Registration of Pending Student : By edit icon  you can make changes, to the course/class of the student, change the date of registration, change - add or subtract or zero, the registration fee, select previous institute from the drop down list and enter any details in remarks box, before allotting the students.
For example, if student changes the mind and want to go for another course/batch/class or wrong class was selected in the online or offline registration form, and this changes has been requested, this edit registration option will be useful.
Enter the required details in form fields and click ‘Save’ and a pop up in green will be displayed as “registration updated”
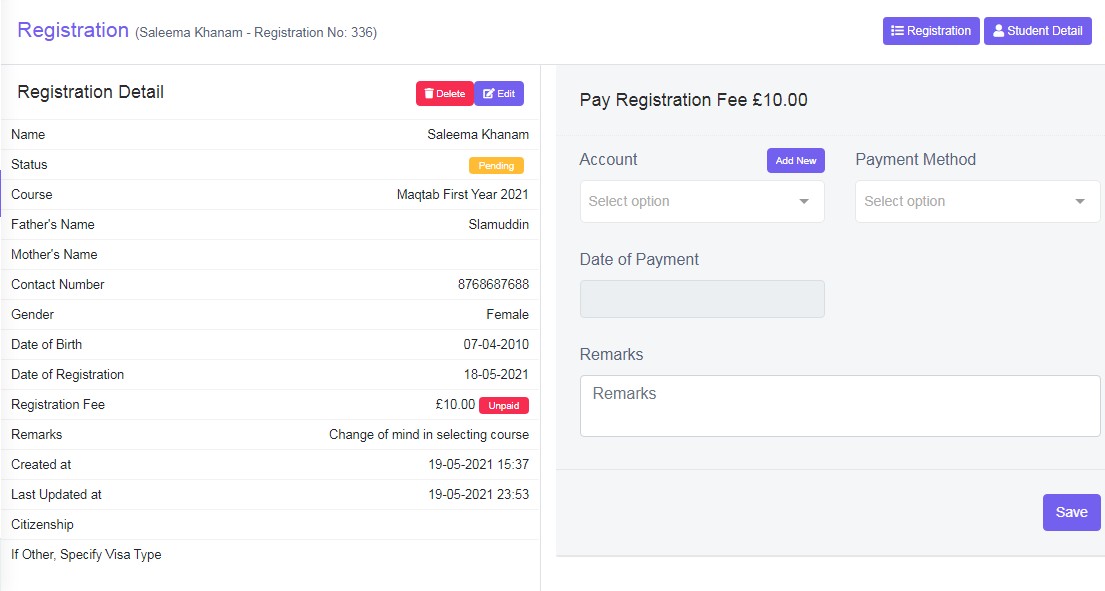
Figure 15
Refer figure:15 and figure 16 : Course has been changed from Hafeez to Maqtab and as this course has registration fee , payment details fields is displayed, which needs to be entered before allocating the students.
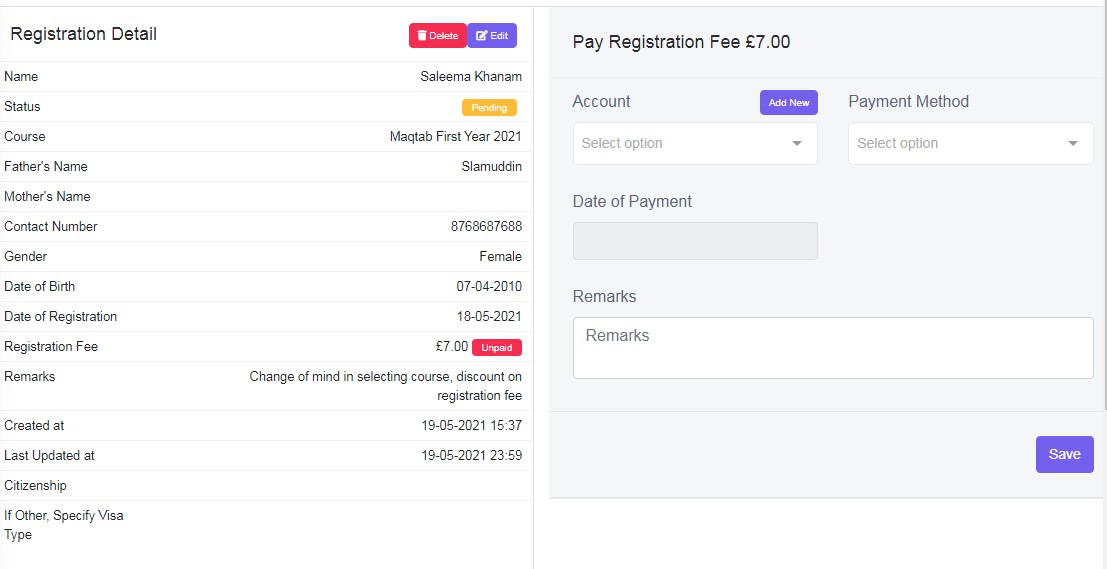
Figure 16
Edited registration fee and updated the remarks again, for the same student and saved. The edited fee amount and remarks is changed and displayed on the view. So you can edit as many times as required and then do the allocation. Refer figure:14.
Pay registration fee Fields Description
This form fields have Account, Payment method, Date of Payment and Remarks to be entered.
Account: This needs to be setup in Finance – Account tab. Please refer Main module of Finance User Manual for more details. Select the required account from the drop down list.
Payment Method: This needs to be setup in Finance Module. Please refer Module configuration – Finance configuration, for more detail setup. Select the required payment method from the drop down list.
Remarks: Enter any remarks if required, this field is optional.
Once the required payment data is entered click save, “Registration fee updated”, will pop up on the right hand side of the screen. And then will be displayed with Registration Action fields and a new Receipt Tab  , will be added to the left hand side . Refer figure:17
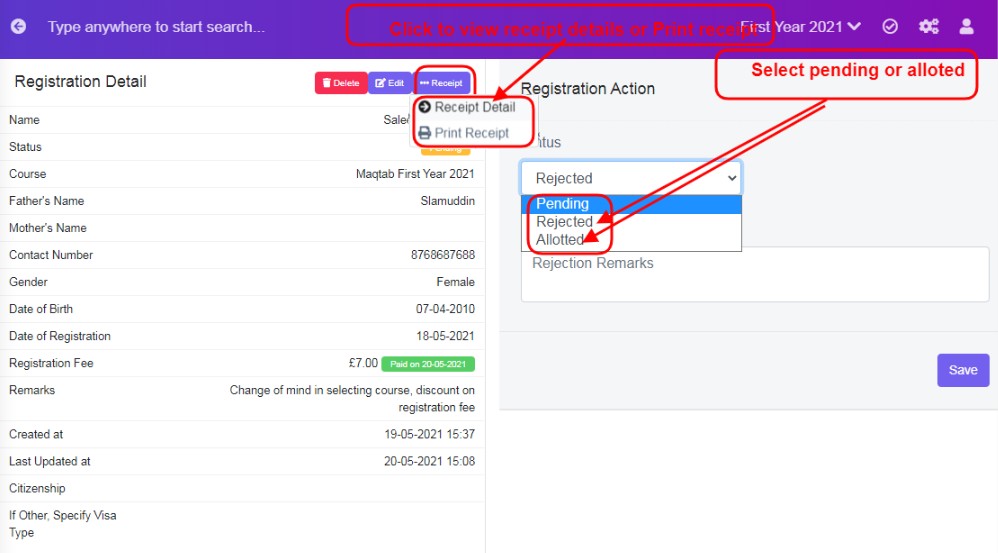
Figure 17
Receipt Detail: Click on it and a pop up screen will be displayed, in the middle of the screen, refer figure: . You can also cancel fee payment, In fee receipt detail if required.
Cancel fee payment:
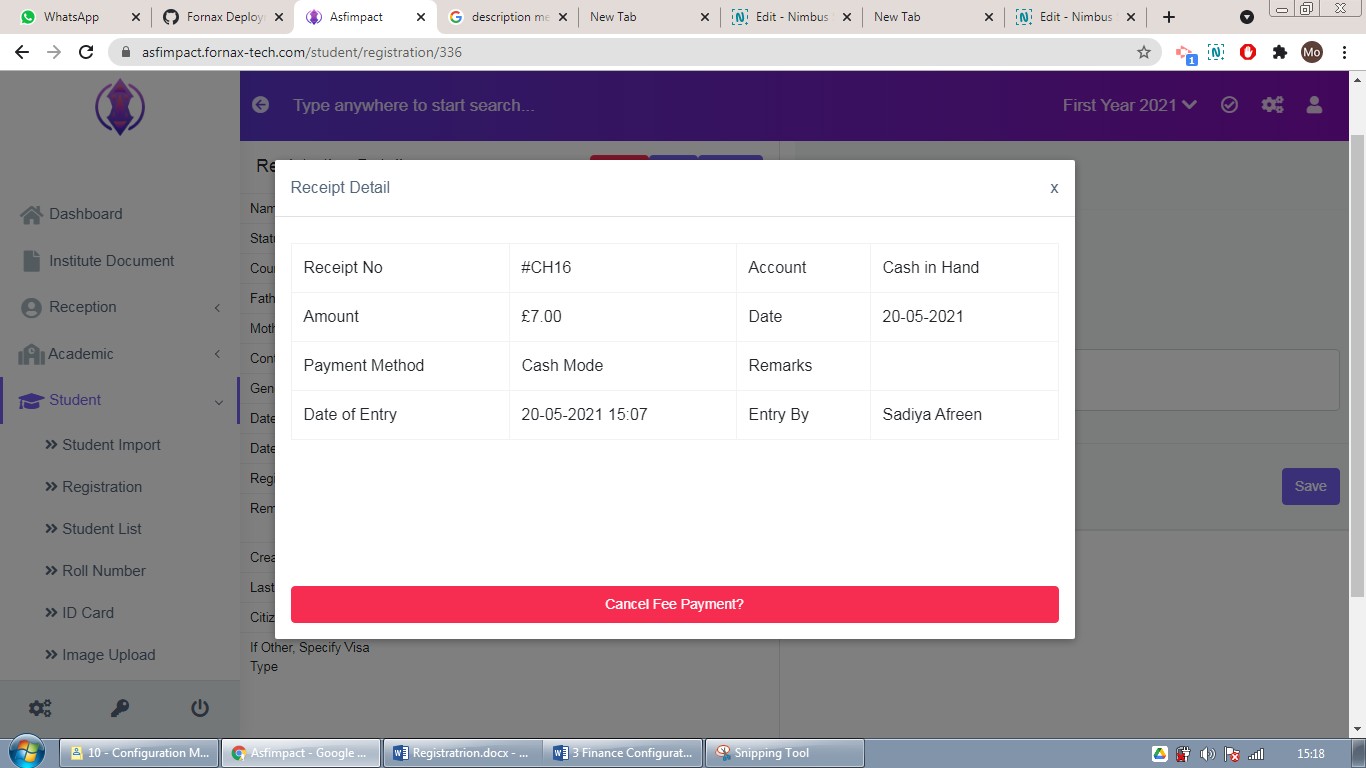
Figure 18
It will display details of receipt no, account, amount, date, payment method, remarks, date of entry and name of the employee who collected or noted the payment. Refer figure:19
If you have entered wrong amount of fee paid or assigned fee to a wrong student, you can use cancel fee payment and redo if required. After fee details is entered, Registration Action is displayed.
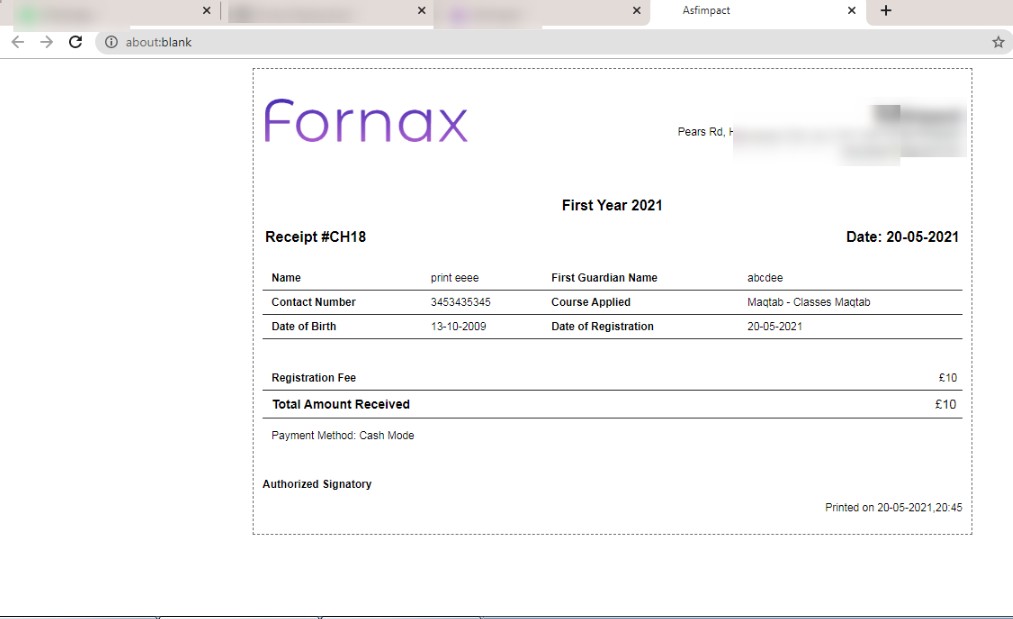
Figure 19
Print Receipt: It can be used to print copy of the Receipt. It will be displayed in a new tab. Refer figure:20.
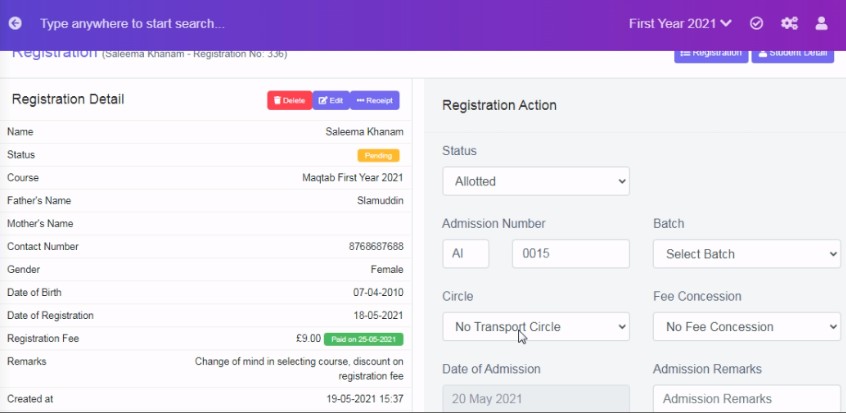
Figure 20