Subject Teacher
This Module helps, to assign Teachers to their respective subjects.
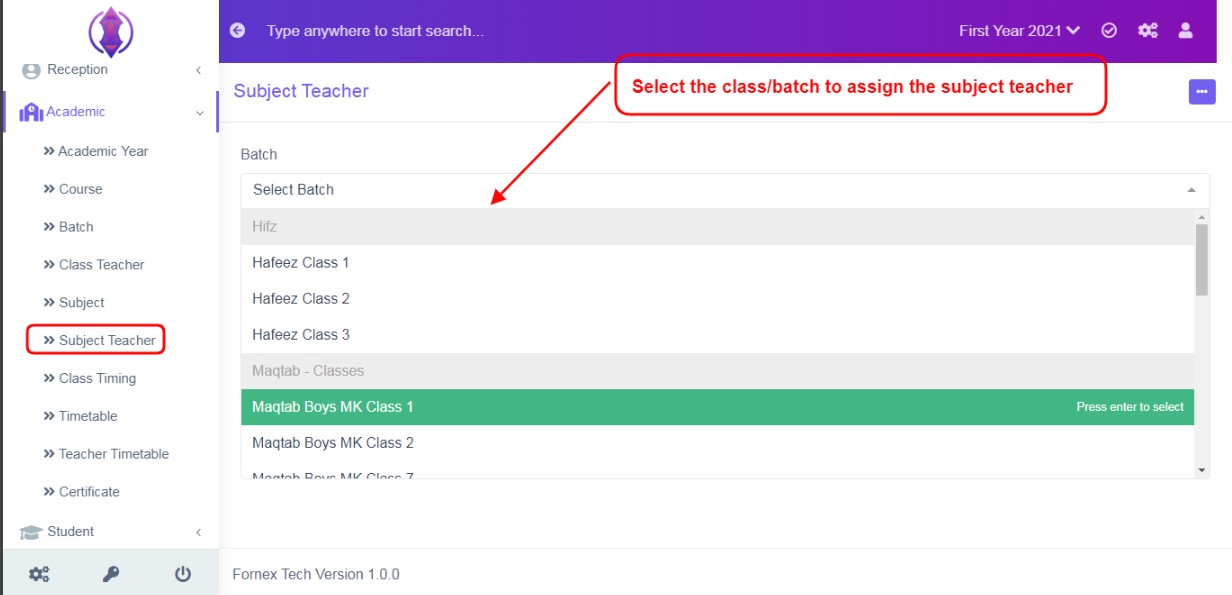
Figure 1To Add A Subject Teacher
Click on Subject Teacher Tab, select the class/batch from the list, to assign a subject teacher, refer figure:1, screen will load and display its related, subjects list, refer figure:2.
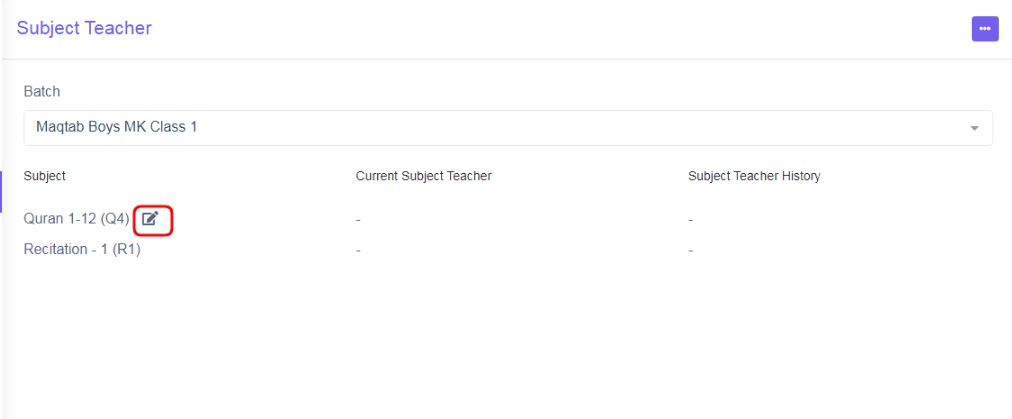
Figure 2
Click edit icon  next to a subject, refer figure:2. Three fields - Select subject Teacher, Date Effective, Description will be displayed below, refer figure:3.
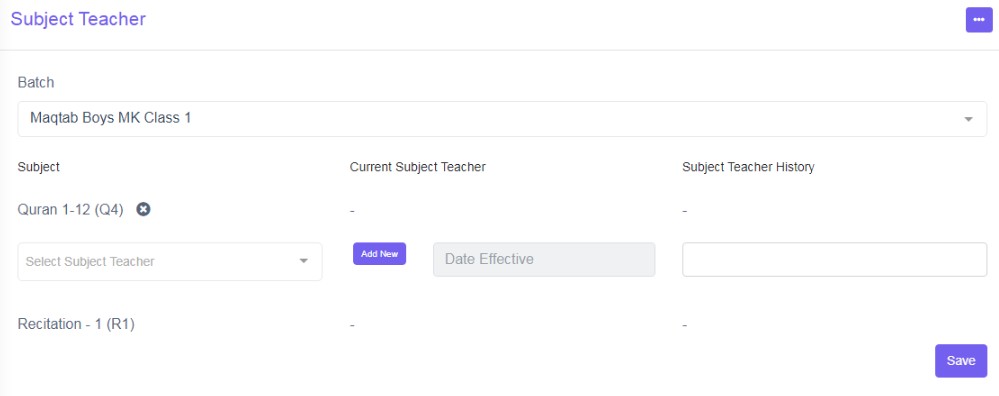
Figure 3
Select Subject Teacher: This is to assign a subject teacher to Class/Batch, select a teacher from the drop down list. This field is Mandatory.
If you are in the initial stage of setup of management system, you see the drop-down list as “list is empty” is displayed, and is empty.
To Add Employee/ Add subject Teacher, click ‘Add New’ tab , a pop up screen will be displayed in the middle of the screen refer figure:5. Enter the required data, click save button of the pop up screen. For more details of Form Fields Description of adding employee, please refer to Employee Module.
Date of Effective:The Date of starting in a subject teacher. This field is Mandatory.
Description:Enter the description as required. This field is optional.
Select a subject teacher from the drop down list, select a date of effective from calendar view and enter description and click ‘Save', refer figure:3’. At bottom right of the screen a green pop up will be displayed as “Subject Teacher Added”.
In order to edit and delete the subject teacher, start again, with selecting the class/batch and subjects will be listed.
Edit Class Teacher : Click Edit icon to edit subject teachers details.
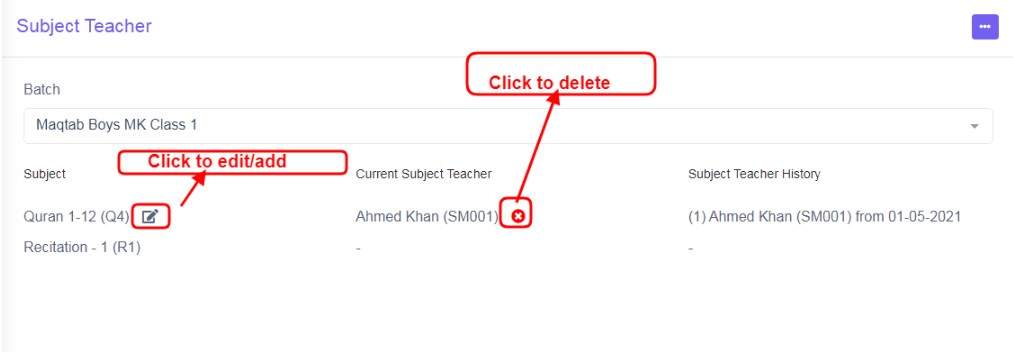
Figure 4
Delete Class Teacher: Click  this icon to delete the record of the subject teacher, a pop up screen comes up, asking for your confirmation
  to proceed with the request, click, continue, to delete the record or click close to go back .
Cancel Icon:This cancel icon  is showed up while adding a subject teacher to cancel filling in the details and to go back to the list view click, this cancel icon to go back list view.
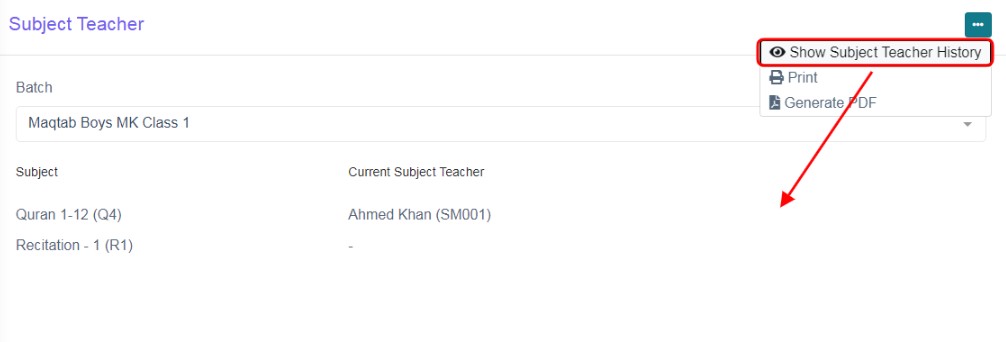
Figure 5
Show Subject Teacher History:Click Show subject teacher history, in the data table view, the column of subject teacher history is shown, you will view the history of subject teachers and its effective dates. refer figure:5&6, if clicked on hide subject teacher history, column will be empty/hidden you Refer figure:5&6.
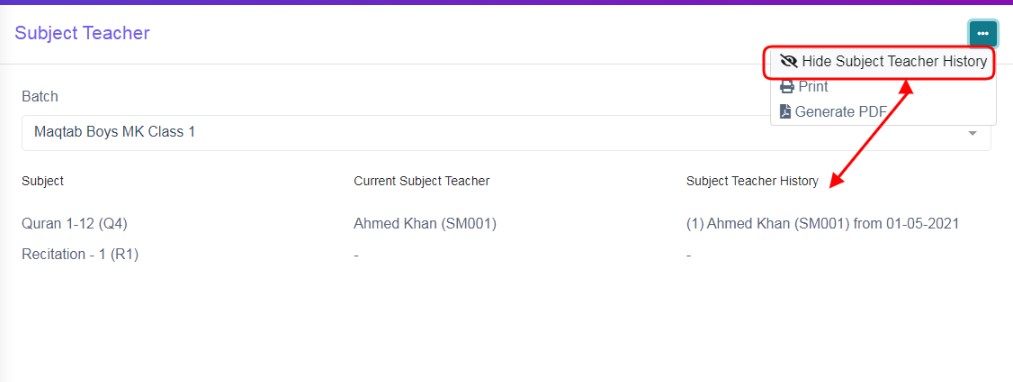
Figure 6
The three dots tab contains two more options, Print and Generate PDF.
Print Option:To print the table list view data, click ‘Print’, this will Open a new page, listing table view data, to Print. Refer figure:7.
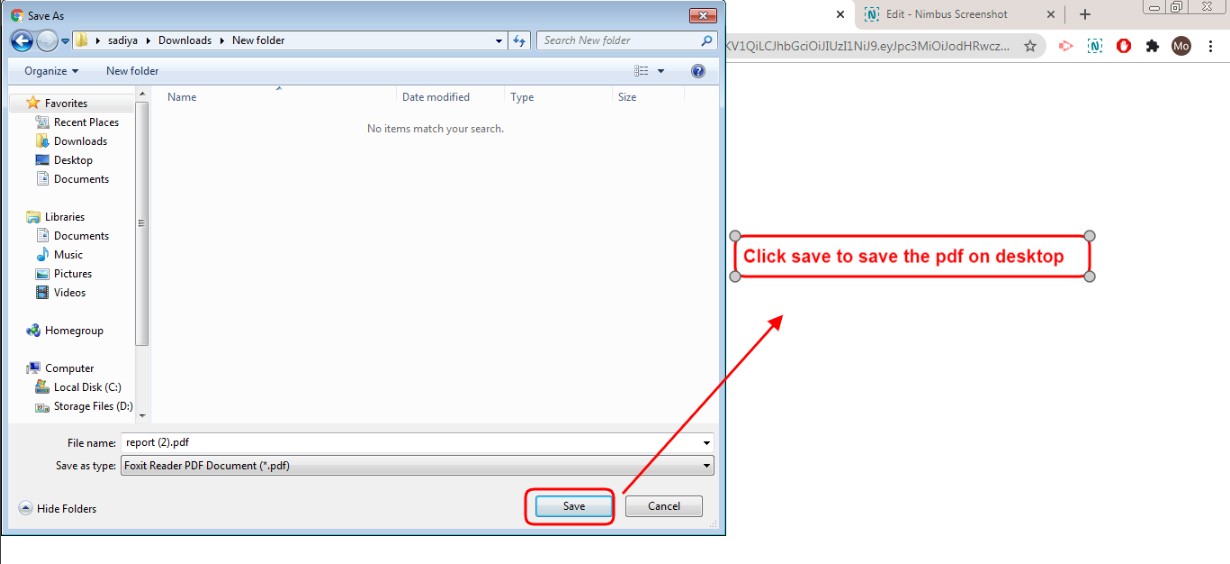
Figure 8
Generate PDF:To download PDF to the desktop, click ‘Generate PDF’, a pop up save as box will open confirming it to save it on desktop. Click ‘Save’ of the pop up box and the pdf will get saved on your desktop. Refer figure:8.
Class Timing
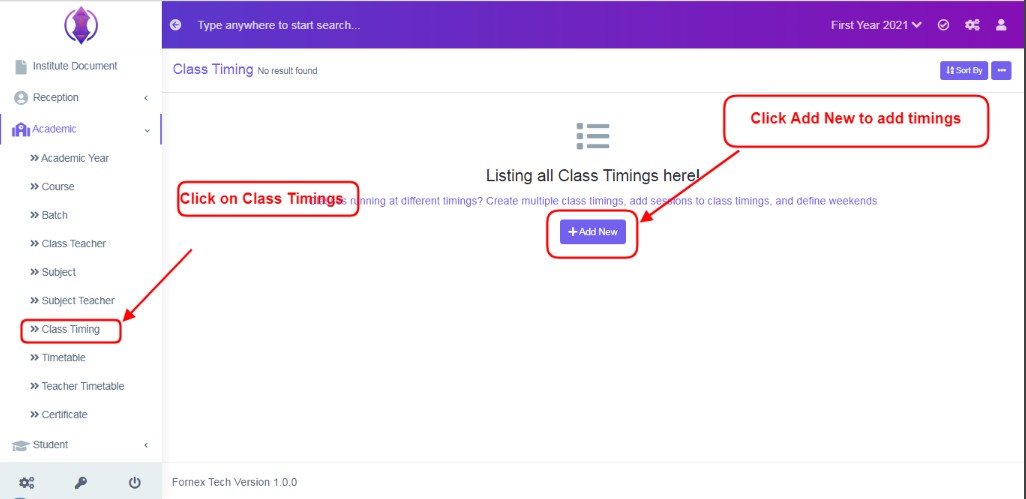
Figure 1
Class Timings is the master module to configure time tables, of subjects, courses/batches/classes.
Classes running at different timings? Create multiple class timings, add sessions to class timings, and define weekends.
Add New Class Timings
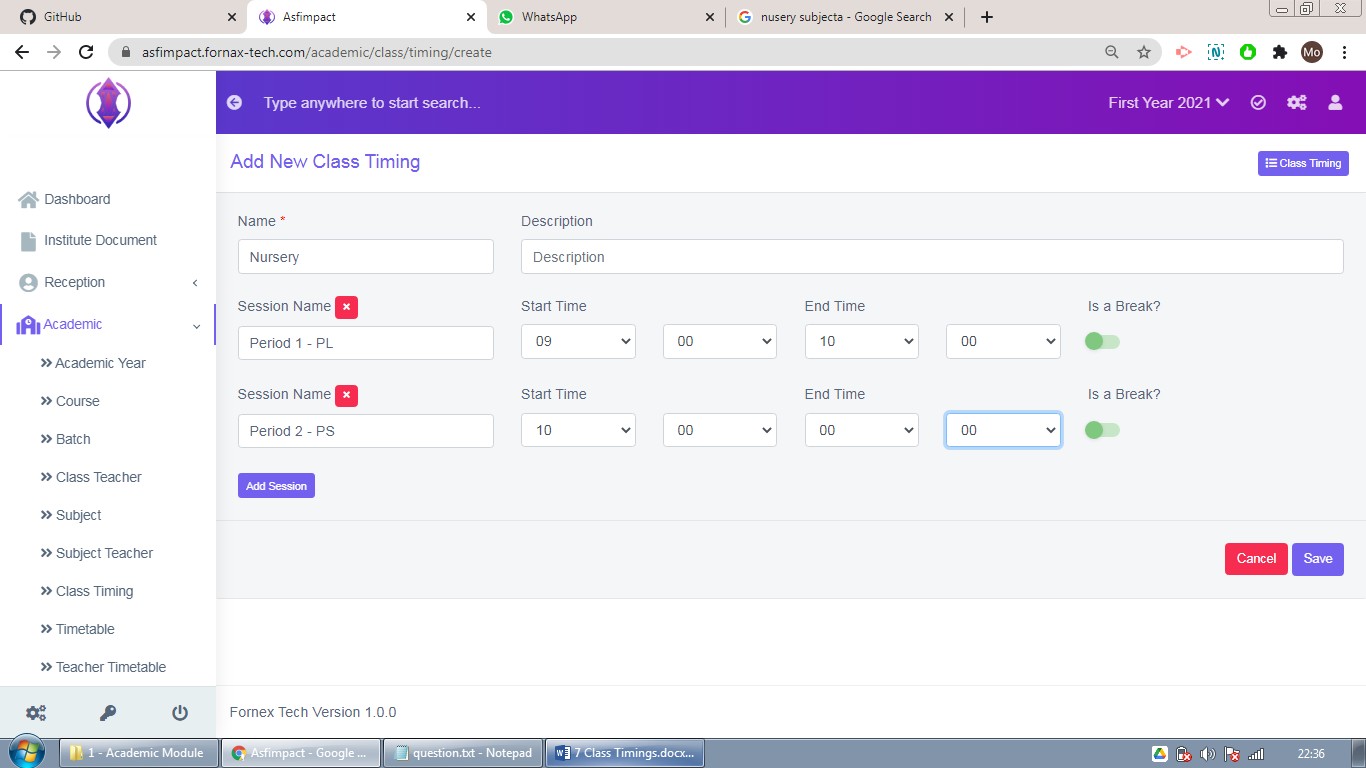
Figure 2To add a new timings, click on Class Timing Tab, refer figure:1, click on ‘Add New’ and a new screen to enter data is displayed, enter data in to their respective form fields, refer figure:2.