Academic Year
Academic Year
- — Add Academic Year
Form Fields Description
Data Table View Description
- — Default Icon
- — Edit Academic Year
- — Delete Academic Year
Page Title Bar Tabs Description
Sort By
More Options Description
- — Print Option
- — Generate PDF
In Academic Year Module, you can create multiple academic session, choose your default sessions and switch between those sessions. It can be a Year, Half year, Quarterly, Monthly or even days’ sessions.
Ex: One Year Sessions - you can create academic session of a year, i.e. 01-Jan-2021 to 21-Dec-2021. So forth your next year session should be created as 01-Jan-2022 to 31-Dec-2022
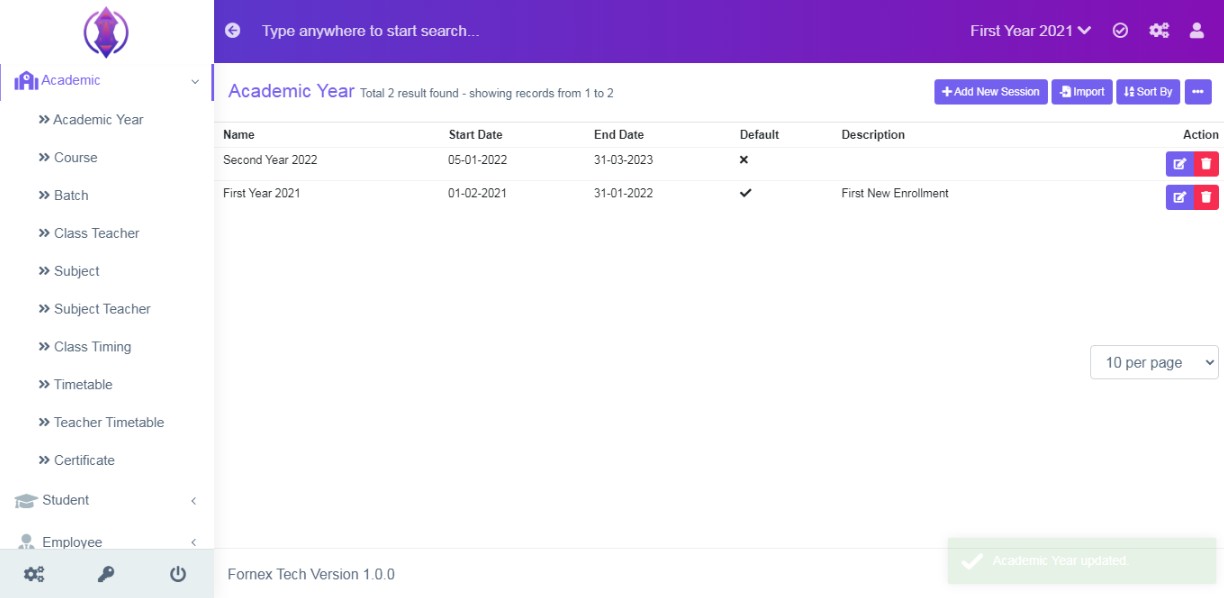
Figure 1
Figure 2Add Academic Year:
Click Academic Year menu and click ‘Add New’, refer figure:2, a new screen to enter data is displayed, refer figure:3, enter data in to the respective form fields, to add new academic year or sessions.
Form Fields Description:
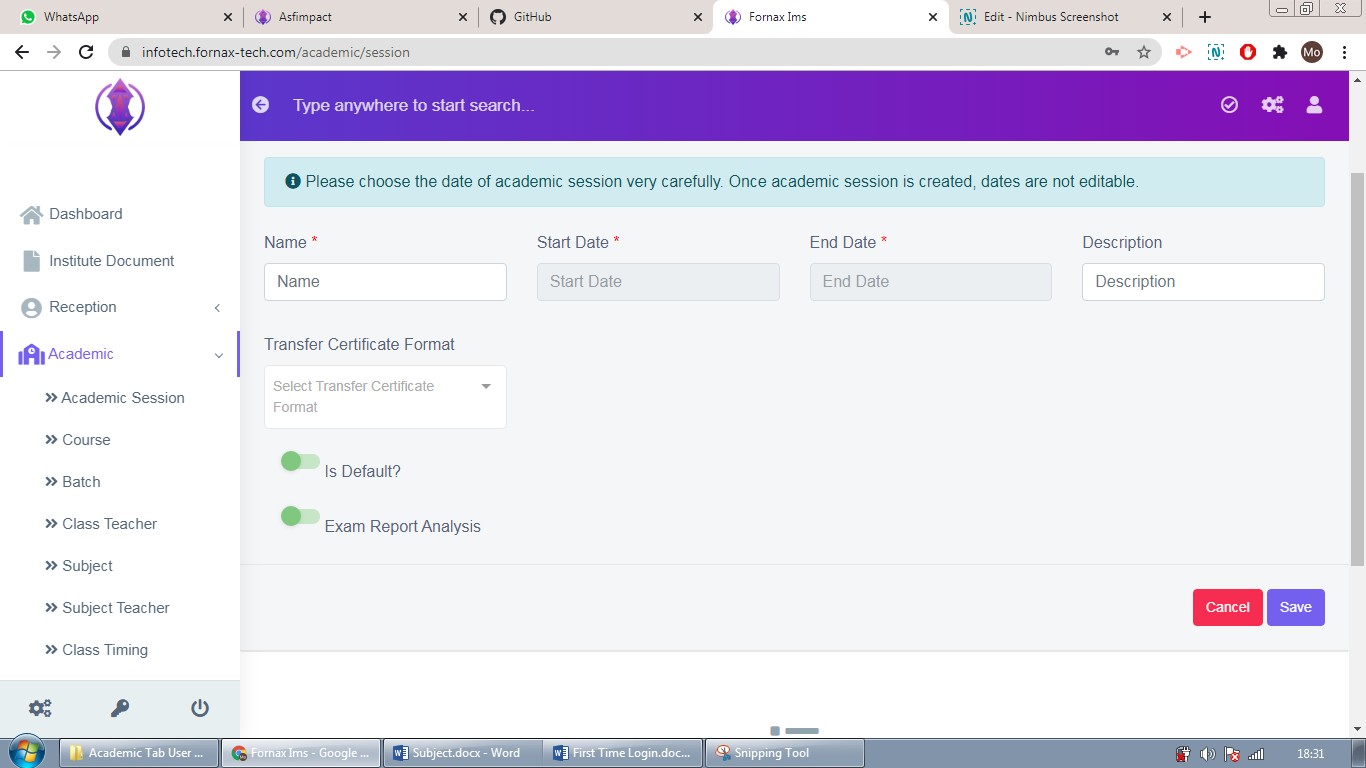
Figure 3Name:
Enter a name for your academic session/year.
Start Date:Select the start date of the academic year.
End Date:
Select the end date of the academic year.
Description:If you want to give description to the document, in detail, it can be given here. If this field is left empty, in the data table view, description column will be empty.
Transfer certificate Format:Select transfer certificate from the drop down list. This field is optional.
Is Default: Select this year as default, the year/session to enter data or edit data, in the selected default year. Refer data table view description – Default Icon for more information.
Exam Report Analysis: Enable or disable exam report analysis.
Once the academic year is saved, all the added academic years, can be viewed at one place, at front–end i.e data table list View, refer figure:4 – Data table View.
Data Table View Description:
Data table View Important Fields Description:
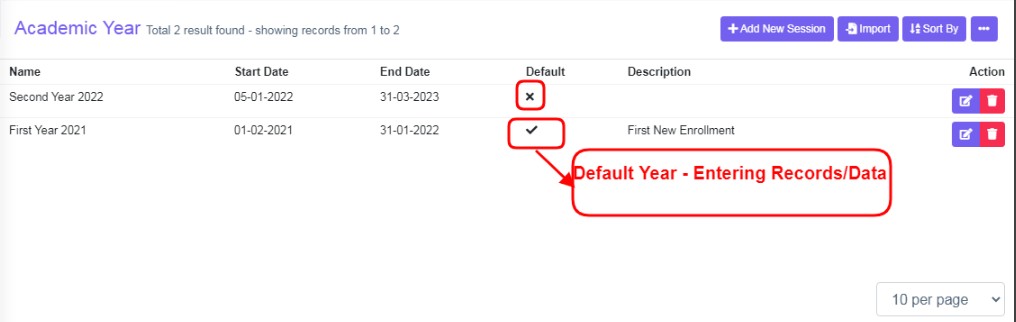
Figure 4Default Icon
Here Default option if enabled  in the form, in the data table in default column, it will be represented as tick mark
  , if it is disabled in the form, in the data table in default column, it will be represented as x mark ,
  , refer .figure:4

The ‘First Year 2021’, is the year, you are entering data into. If you want to enter data in ‘Second Year 2022’, Click Edit, enable default option in ‘Second Year 2022’, automatically ‘First Year 2021’ will be disabled.
Another way of quickly switching between default year is an arrow tab in the header bar. Refer figure:5
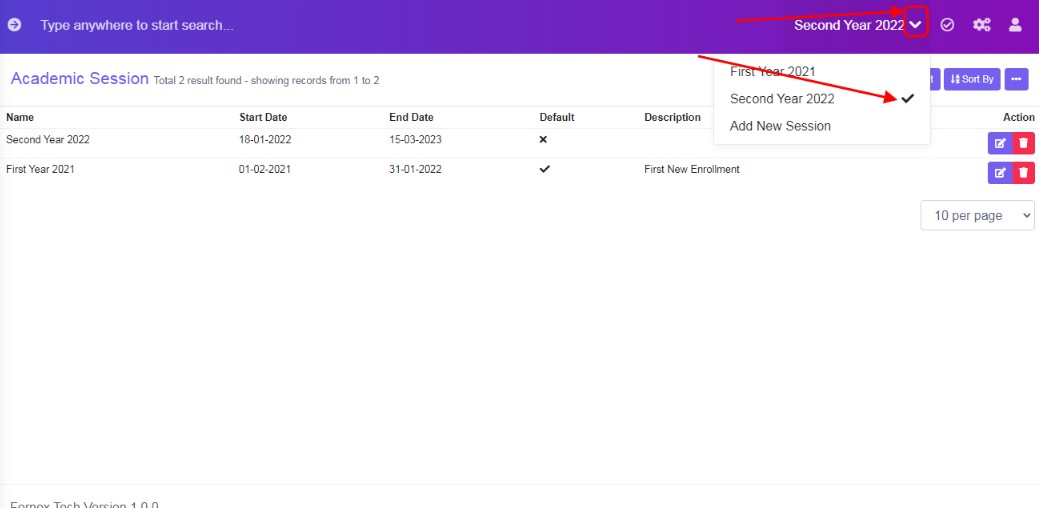
Figure 5Edit Academic Year:
To edit the existing academic year click  icon and a screen will be displayed to edit year . Fill the required information, to do the changes to the form fields or to enable or disable default years or to make any other changes. Once done, click ‘update’, to save the changes. “Academic Year Updated”,green popup screen
  will be displayed bottom right hand side of the screen, confirming update has been done.
Delete Academic Year:
If you want to delete , the upcoming academic year details ,click delete icon and a pop up screen comes up, asking for your confirmation
  to proceed with the request, click continue, if you want to delete the data or click close to go back to the data table view.
Page Title Bar Tabs Description:
Add New Session:If you have already added an academic session, from middle of the screen, the “Add New Session tab, will get shift to top-right hand side, of the page title bar. And Data Table View with different columns is displayed.
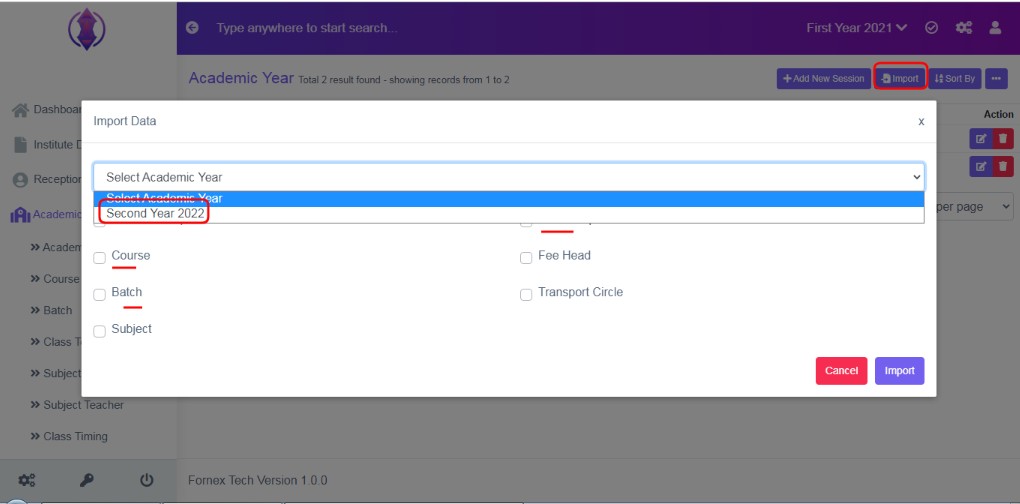
Import:Import option is used to import any previous academic session data to the existing session. Click on ‘.Import option’, a pop up screen will be displayed, Select the previous year data session name to import the data, to the existing year, to import Course, Course group, Fee group, Fee Head, Batch, Transport Circle, Subject, according to your requirements.
Sort By:
Ascending, Descending & Name:Selected Ascending & Name, it will list, in A to Z, alphabetical academic session name in order.
Selected Descending & Name, it will list, in Z to A, alphabetical academic session name in order. Refer figure
Ascending & Descending Start Date:Selected Ascending & Start date, it will list. Date, which were created oldest to newly added, start date in order and descending is vice versa.
Ascending & Descending End Date:Selected Ascending & End date, it will list. Date, which were created oldest to newly added, end date in order and descending is vice versa.
More Options Description:
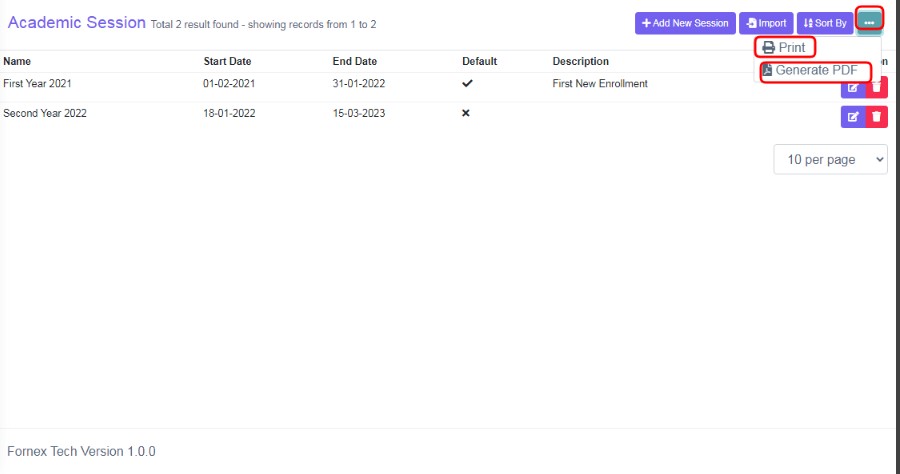
The three dots tab contains two options, Print and Generate PDF.
Print Option:
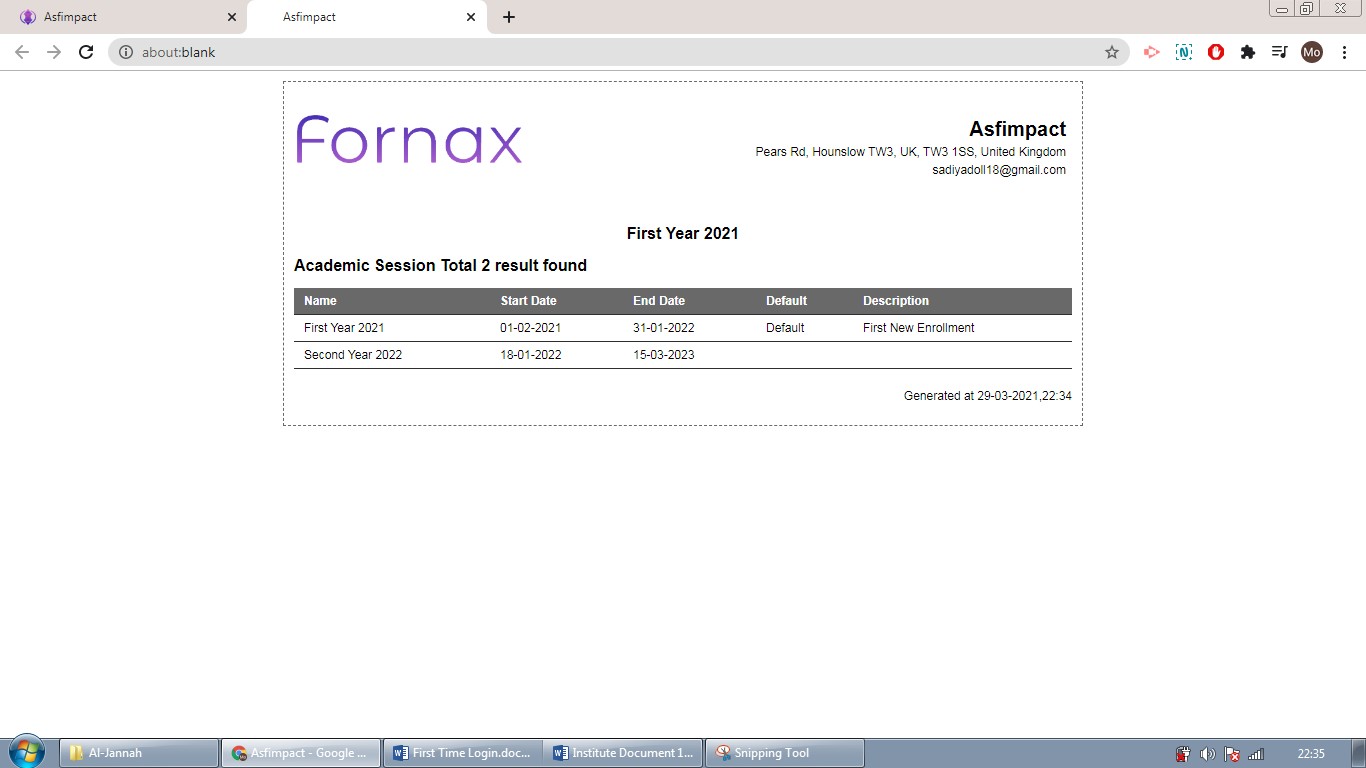
To print the data table view data, click ‘Print’, this will Open a new page, listing table view data, to Print.
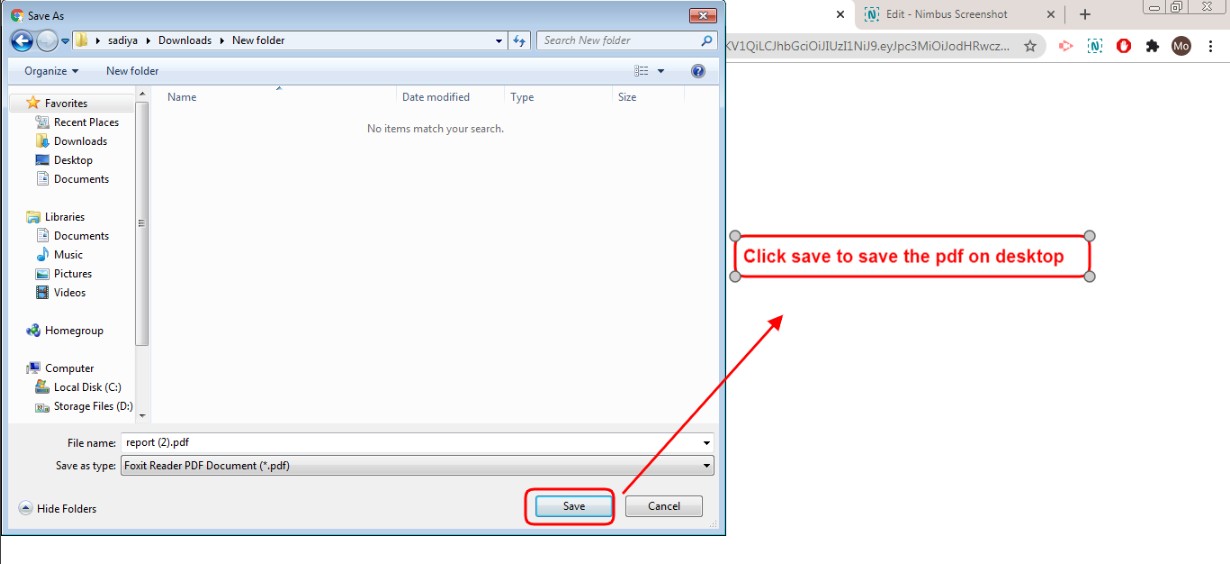
Figure 6Generate PDF:
To download PDF to the desktop, click ‘Generate PDF’, a pop up save as box will open confirming it to save it on desktop. Click ‘Save’ of the pop up box and the pdf will get saved on your desktop.