Time Table
Time Table
Form Fields Description
Data Table View Description
- — Add New Document Tab
- — Status
- — Allocation
- — Edit Timetable
- — Delete Timetable
Store and manage your timetable at one place and take print out of the single or multiple batches. Select Class timings, assign working days and off days according to your requirements.
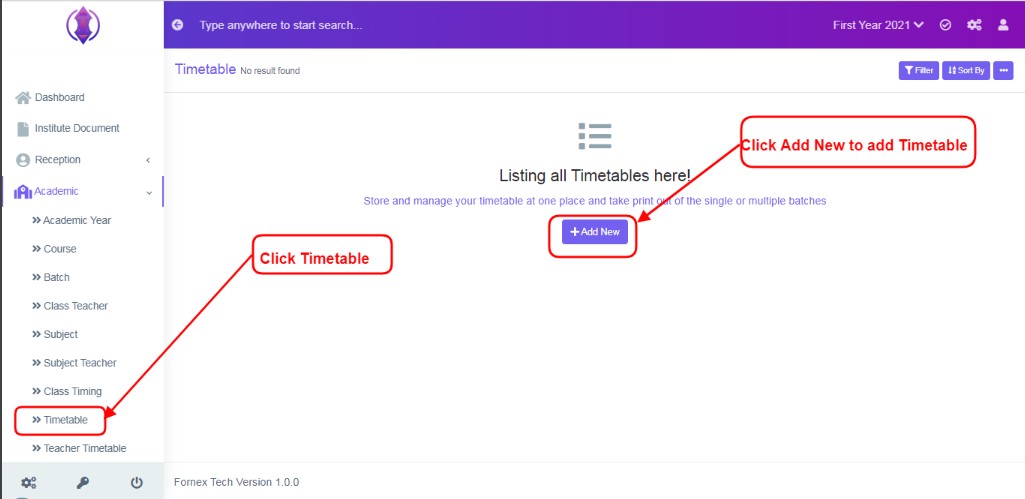
Figure 1To add a new timetable, click on Timetable Tab, refer figure:1, click on ‘Add New’ and a new screen to enter data is displayed, enter data in to their respective form fields, refer figure:2.
Form Fields Description:
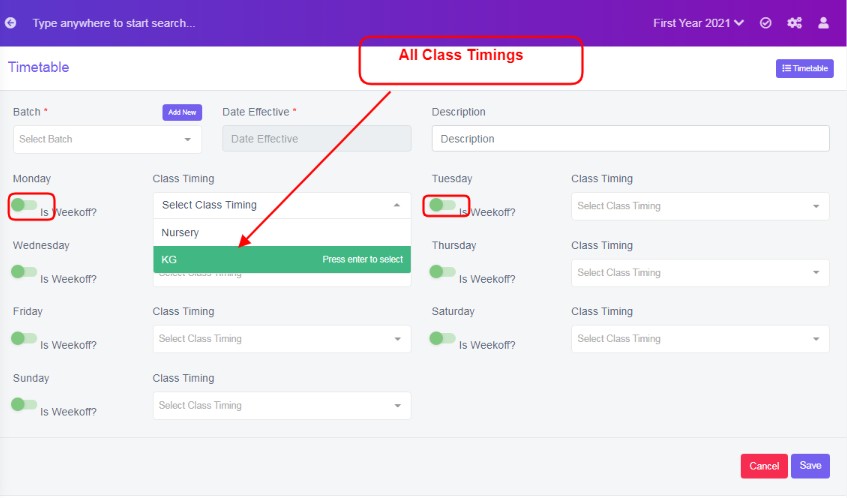
Figure 2
Batch: Select the batch from the drop down list to assign time table. One batch timings can be assigned one at a time only.
Date of Effective: Select date of effective from the calender view.
Description: It is to give description to class timings, in detail. If this field is left empty, in the data table list view, description column will be empty. This field is optional.
Monday - Sunday Is Weekoff?: Enable to assign week off, disable to assign working day.
Class Timings: The master timings created in class timing tab, will be listed here, select the required one from the drop down list.
After the required information is entered, click ‘Save’, a popup message appears in Green as “time table added”, and will be redirected to the data table view refer figure:3.
Once the time tables are saved, all the added time table information can be viewed at one place, at front–end in data table list View, refer figure:3 – Data table View.
Data Table View Description:
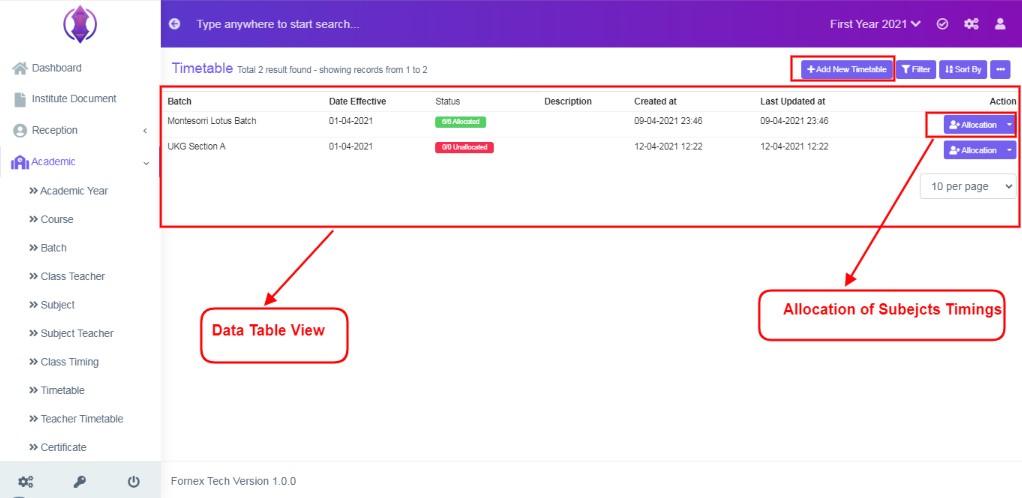
Figure 3Add New Document Tab
If you have already added a class-timings, from the middle of the screen, the “Add New tab”, will get shifted to the top-right hand side, of the page title bar – “Add New Timetable”, and Data Table View is displayed with different columns of data.
Status
Status column displays a notification in two colours, Green and Red, with allocated and unallocated status, for reference purpose.
Number of classes in a week and allocated subject to those classes is showed in the status.Unallocated Status: Shows as 0/0 unallocated until, if the allocation of subject is not done to those timings.
Created at Last Updated at: Date and Time of created and last updated is displayed.
Allocation
Click on Allocation tab  , screen will be displayed, refer figure:4, select the subjects from the drop down list , to be taken at respective timings.
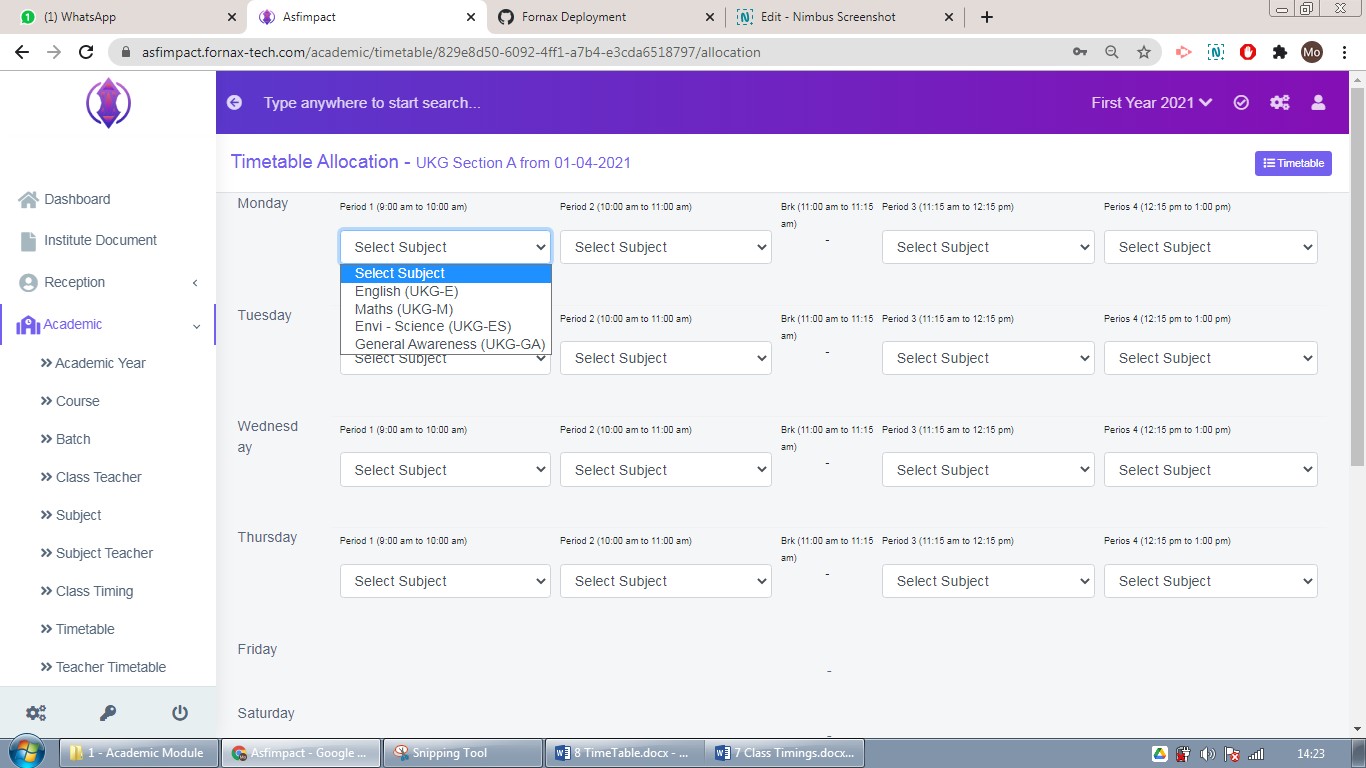
Figure 4
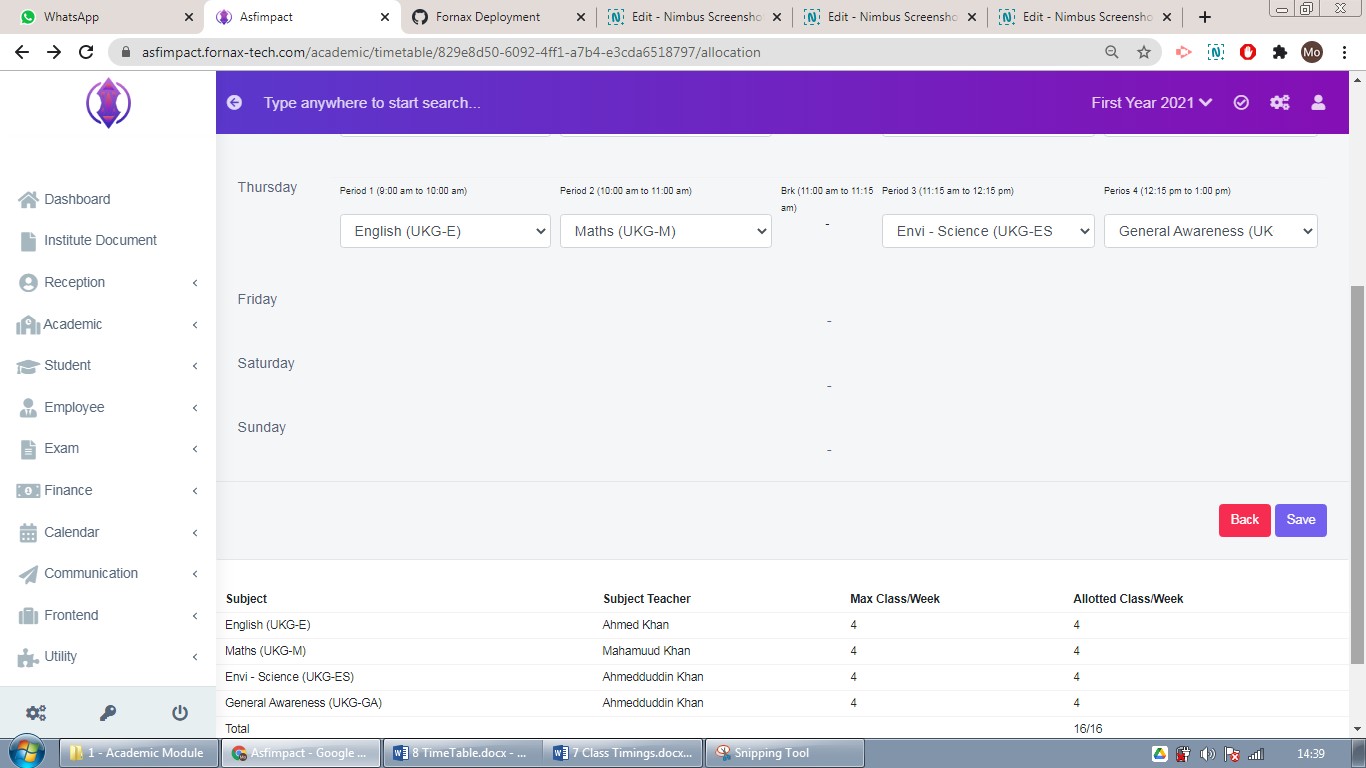
Figure 5In the bottom table below, refer figure:5, subjects and subjects’ teacher, details and the maximum class for those subjects and allotted class for the week, is displayed, for reference purpose. After the required information is entered, click ‘Save’, a popup message appears in Green as “Timetable added”.
Edit Timetable
To edit the timetable, click arrow next to allocation 
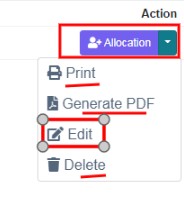 a list of 4 options to print, Generate PDF , Edit, delete is presented, click on Edit option, and a screen will be displayed to Edit class timings. Fill the required information, to do required number of days to be working days or week-off days by enabling or disabling Monday to Sunday.
Once done, click ‘update’, to save the changes. “Timetable updated”, green popup notification will be displayed on the bottom right hand side of the screen.
Again follow the process of allocation tab, in order to assign subjects according to their timings.
Use Print and Generate PDF edit options, of respective batch time-table , in order to print and generate pdf.
Delete Timetable
To delete click  option, the saved timetable, forever, click delete icon and a pop up screen comes up, asking for your confirmation
  to proceed with the request, click, continue, to delete the data or click close to go back to the data table view. Data will get deleted from the database and it cannot be retrieved again.