Event
Event
- — To Add New Event
Form Fields Description
- — Add New
Upload Document
Data Table View Description
Front-End View
To Add New Event:
Create various events, choose the audience, and make it visible on your audience's calendar
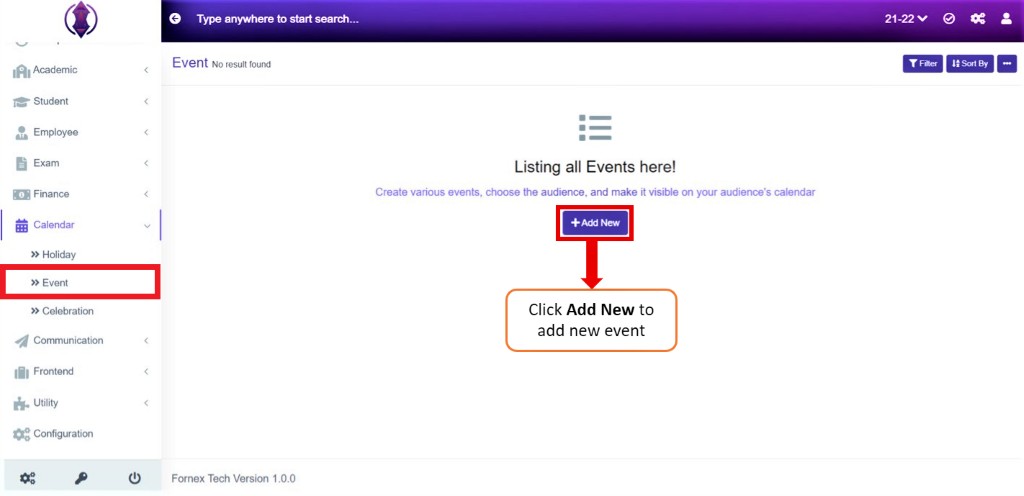
Figure 16To add a new event, click on ‘Add New’ and a new screen to enter data is displayed, refer figure:17, enter data into their respective form fields.
Form Fields Description:
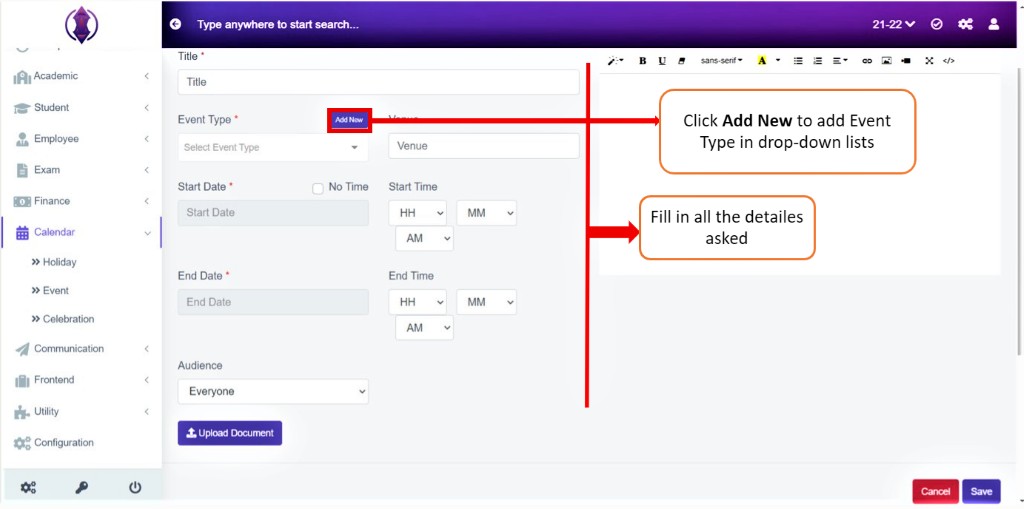
Enter Title, Select Event Type from the drop-down list or click on Add New to add a new event type, Enter Venue, Select Start Date and Start time, End Date and End Time, Select Audience from the drop-down list and Upload document.
Add New:
Click on Add New to add the drop-down list required for the field: Event Type.
Once the user clicks on the Add New button a window pops up where you can add the details for the drop-down list required for a particular field, see figure 17
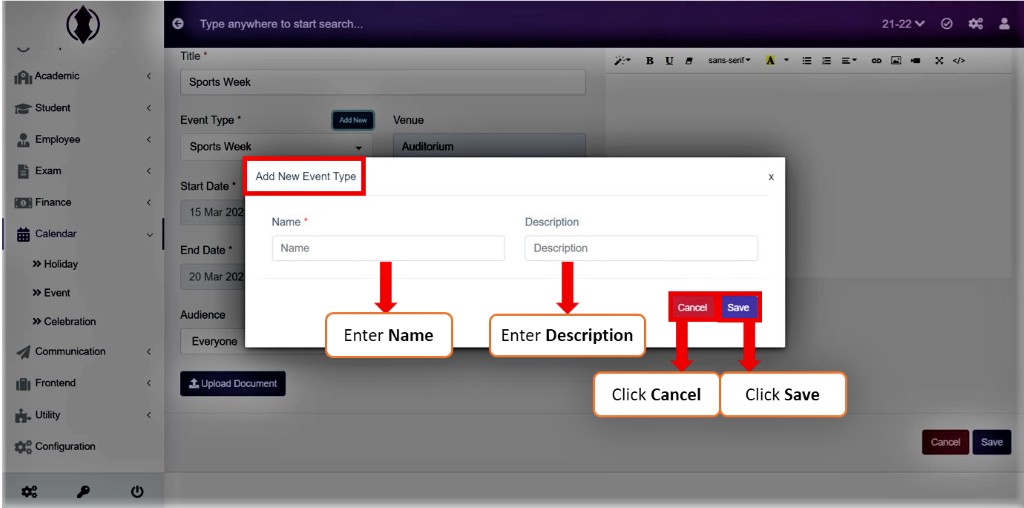
Figure 17Click on Add new to add a new Event Type.
Enter Name and then give in the Description and click save.
Description: If you want to give description to the Event Type, in detail, it can be given here. This Field is optional.
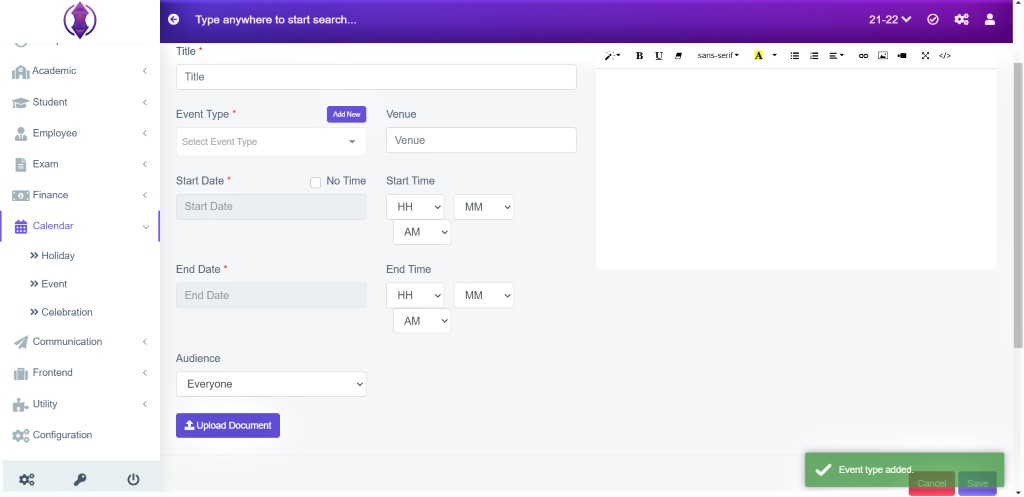
Figure 18After the required information is entered, click “save”, a popup message appears in Green as “Event Type added”, refer figure:18.
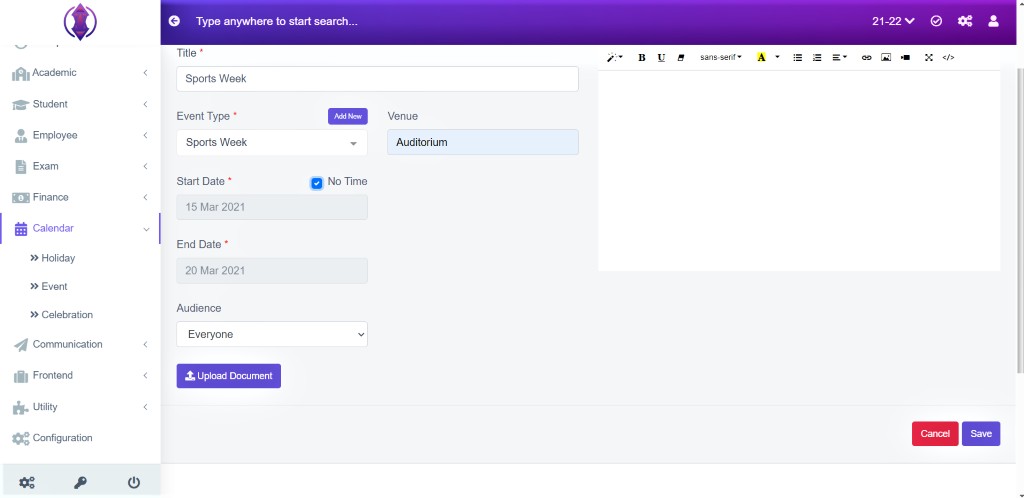
Figure 19Select the checkbox to add an event without Start Time and End Time. Uncheck the box if the event is supposed to be added with Start Time and End Time. See figure 20
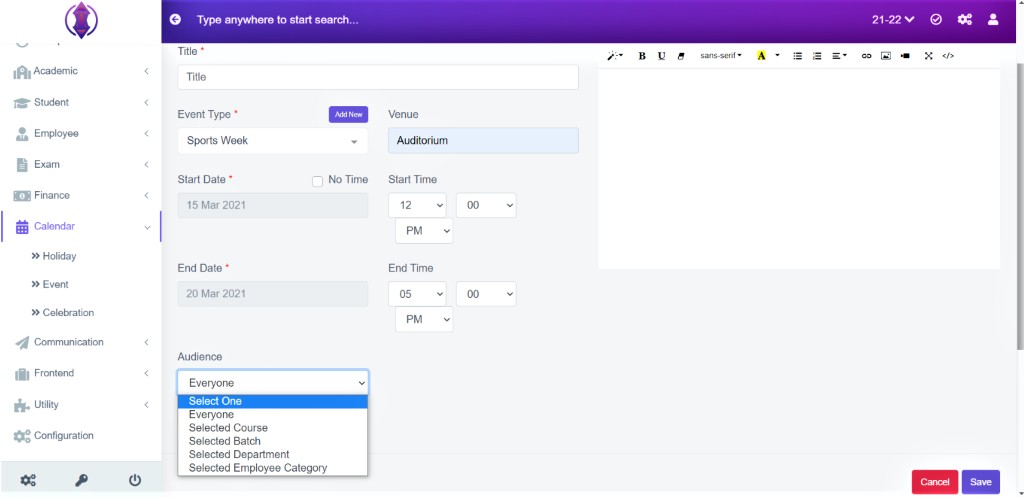
Figure 20Select the Start Date and End Date, by unchecking the box you can also assign Start Time and End Time of the Event
Select the Audience from the drop-down list and decide who you want the audience to be.
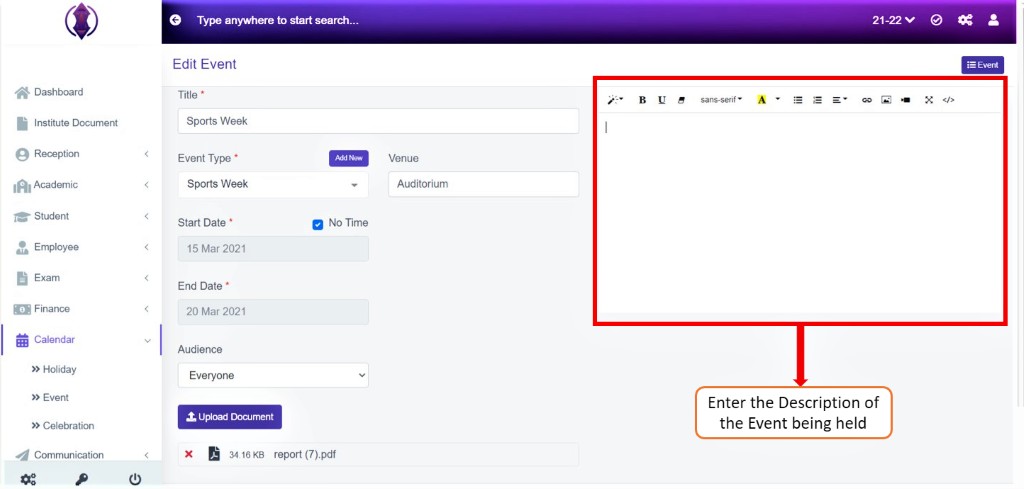
Figure 21Give a detailed Description about the Event being held.
Upload Document
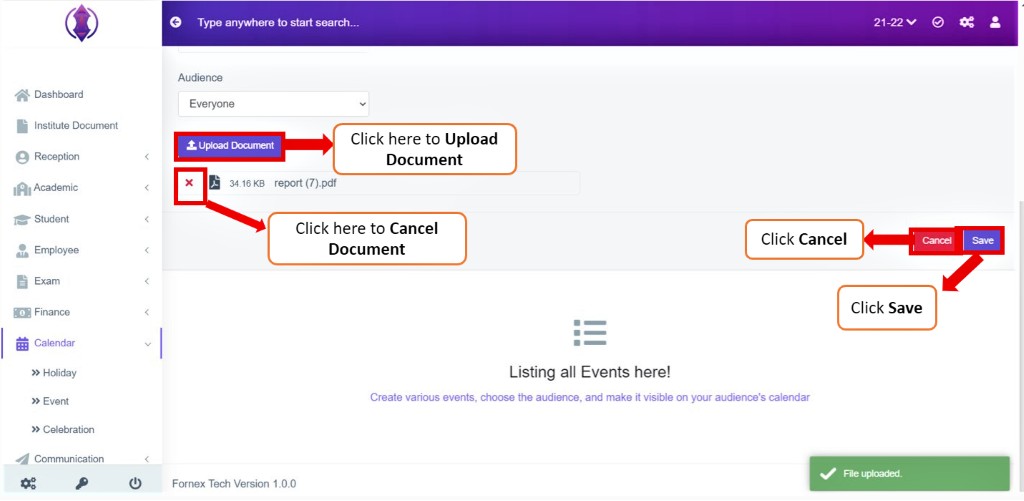
Figure 22Refer Figure:22, Click on Upload document, Select the file which you want to load and Click Open, Once the file is successfully uploaded, a Green Pop-up message will be displayed at the bottom right of the screen as
“File Uploaded”
In order to change/remove a document 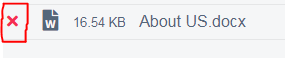 click on the
“X” icon in the red and the file will get deleted and a new one can be added.

Figure 23
After the required information is entered, click “save”, a popup message appears in Green as “Event Added”, refer figure:23
Once the Event is added details are saved at the bottom in Table List View.
Data Table View Description:
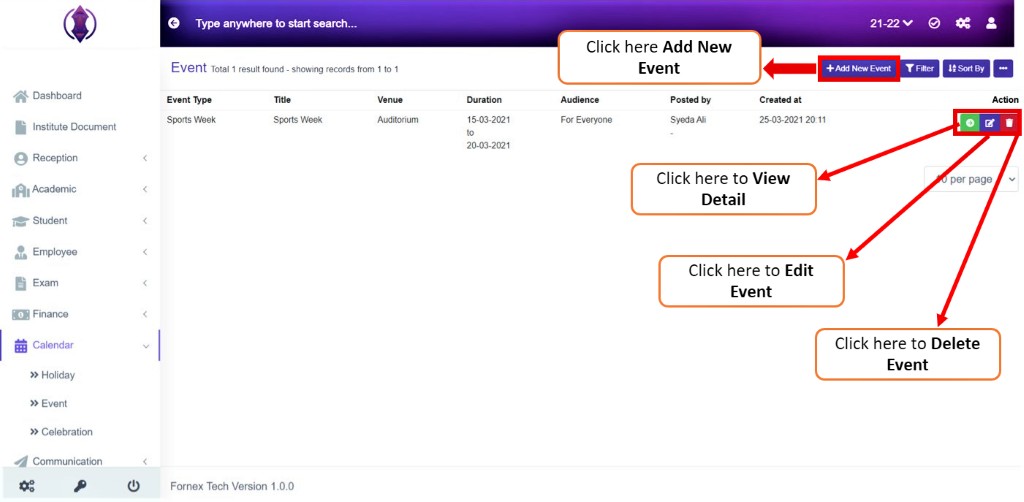
Figure 24
Add New Event: If you have already added the event, and is visible in the table list view, the “Add New Event”, will get shifted to top-right hand side, of the page title bar, refer figure:24.
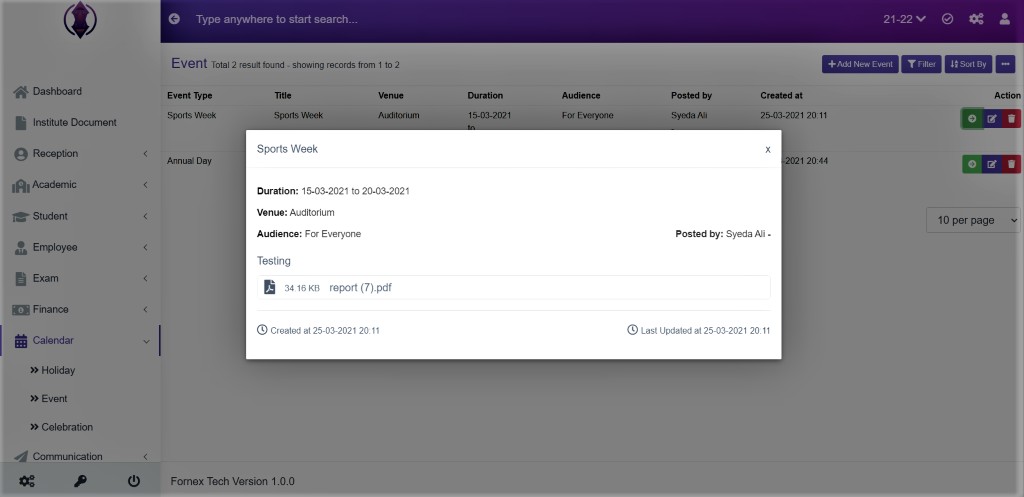
Figure 25
View Event: To View the event, click  from the Actions, and you will get a popup screen, refer figure:25
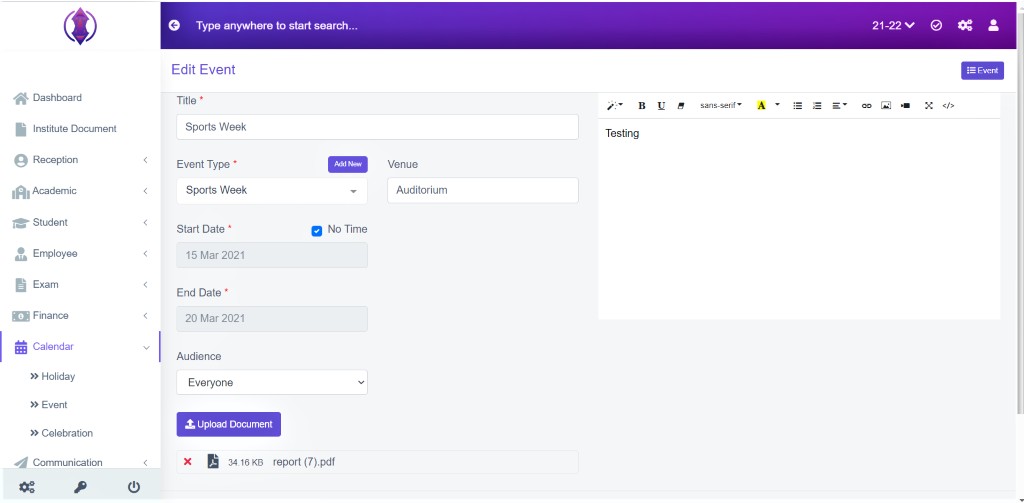
Figure 26
Edit Document: Refer figure:26, To edit the existing Event click  icon and a screen will be displayed to Edit Document. Fill the required information, to do the changes to the form fields or to upload documents.
Once done, click ‘update’, to save the changes.
Delete Document: If you want to delete, the saved event details and attached files, forever, click delete  icon and a pop-up screen comes up,
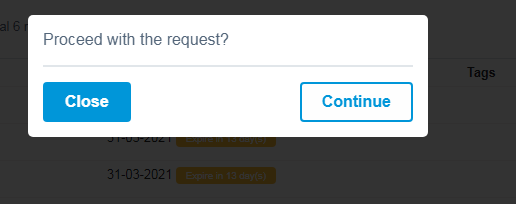 asking for your confirmation to proceed with the request, click, continue, if you want to delete the data or click close to go back to the table list view. Data will get deleted from the database and it cannot be retrieved again.
You can use Filter Fields, Sort by List, from more options, Print and Generate PDF, to view and print the displayed table list view data according to your requirements.
Front-End View:
The events added will be displayed on the front-end in the Events menu.
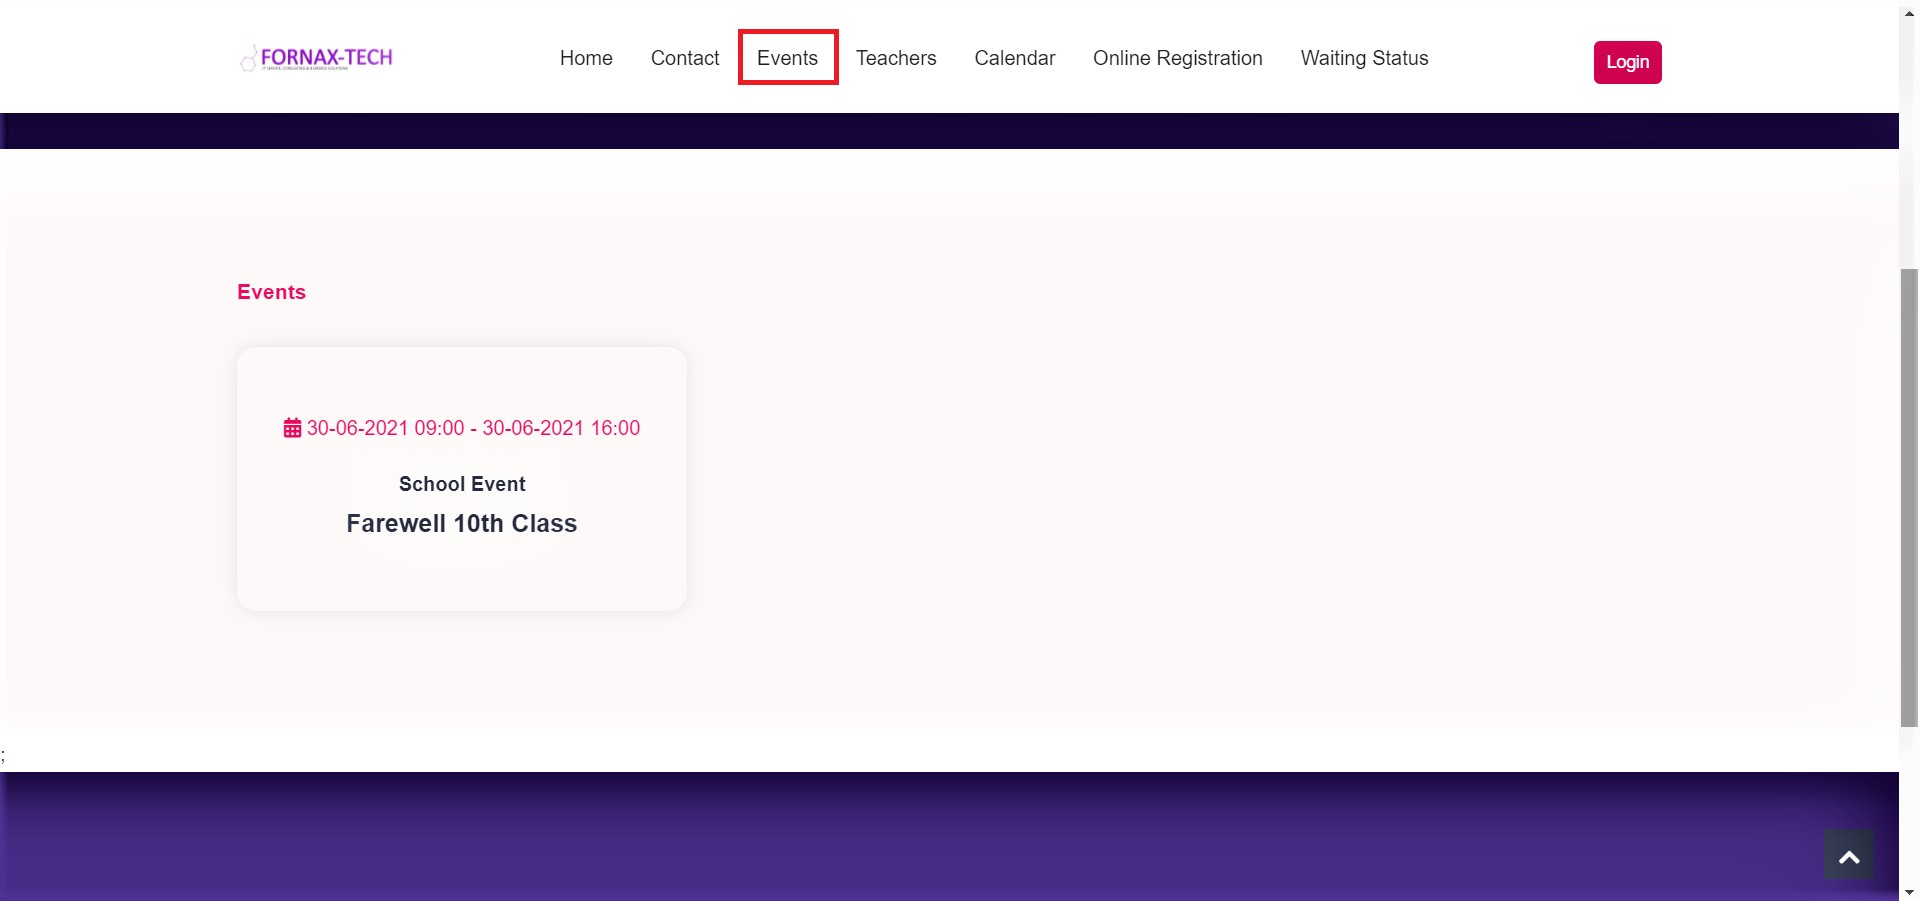
Figure 27