Institute Document
Institute Document
- — To Add A New Documennt
Form Fields Description
- — Title
- — Date of Expiry
- — Description
Upload Document
Data Table View Description
- — Add New Document Tab
- — Date of Expiry Green Notification Bar
- — View Document
- — Edit Document
- — Delete Document
Institute Document Module, is where you can store various Institute Documents, all at one place. These Documents will be stored online in our database. So there will be no fear of losing the documents or fear of getting corrupted, either from office or by saving them on the desktop, due to unforeseen reasons.
The example of documents which can be saved are as below, Example:
-- Essential Certificate
-- Land Certificate
-- Recognition Certificate
-- Affiliation Certificate and many more
To Add A New Document:
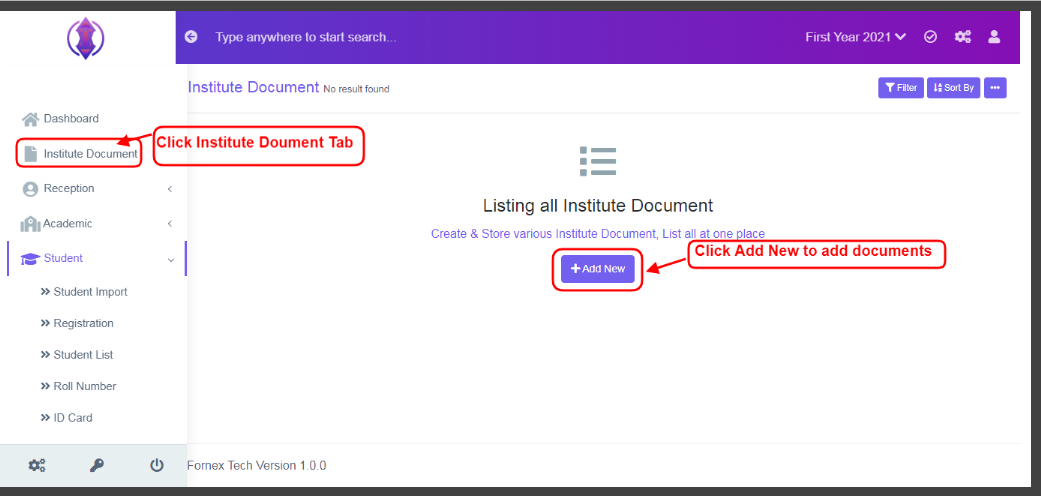
Figure 1To add a new document, click on ‘Institute Document’ Tab, refer figure:1, click on ‘Add New’ and a new screen to enter data is displayed, refer figure:2, enter data in to their respective form fields, to add new document.
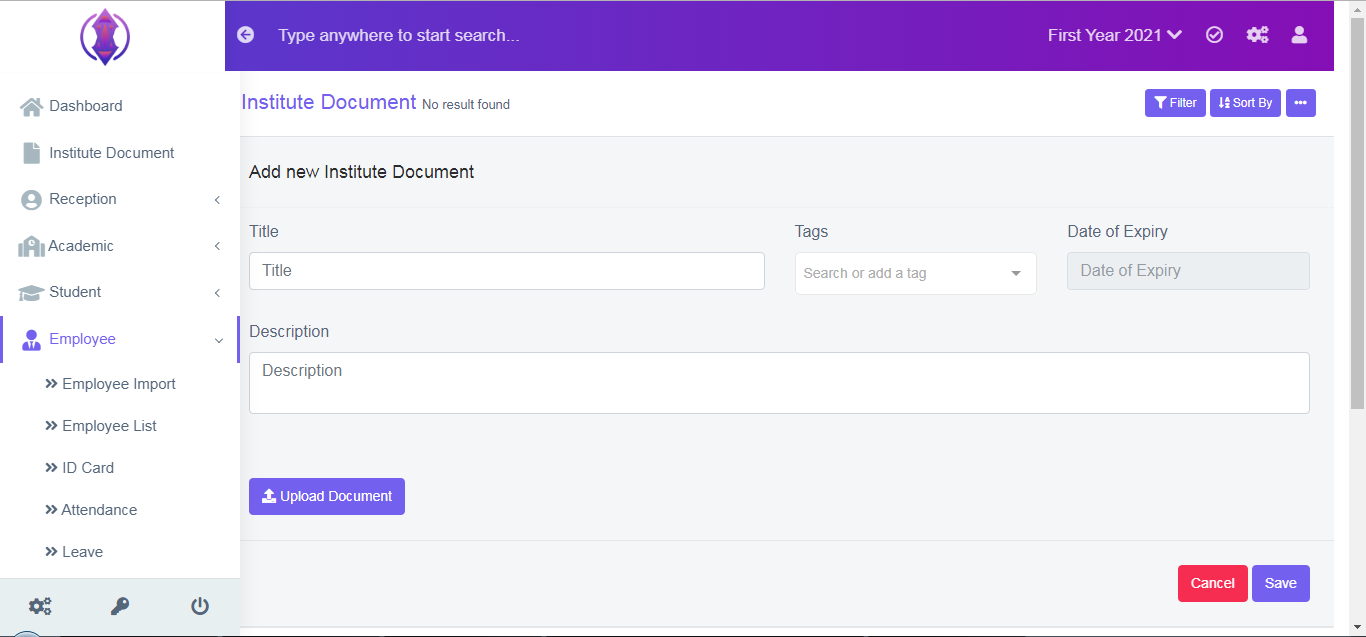
Figure 2Form Fields Description:
Title:
.png)
Figure 3Enter the Title Name of the document as you required, which you want to save and view. This Field is Mandatory.
Date of Expiry:
If your document has date of expiry, select the date of expiry from the calendar 0.1.png) view.
view.
In the data table view, the ‘number of days left’ to renew the document 0.2.png) will be displayed as a reminder, This Field is optional. Refer figure:7 for more info.
will be displayed as a reminder, This Field is optional. Refer figure:7 for more info.
Description:
To give description to the document, in detail, it can be given here. If this field is left empty, in the data table view, the description column will be empty. This Field is optional. Refer figure:6.
Once the above forms fields information is entered, click Upload Document.
Upload Document:
.png)
Figure 4
Refer figure:4, Click on Upload document, Select the file which you want to upload and Click Open, Once the file is successfully uploaded, a Green Pop up message will be displayed at the bottom right of the screen as,
“File Uploaded”
In order to change/remove a document 0.1.png) click on the
click on the
0.2.png)
Figure 5
After the required information is entered, click ‘save’, a popup message appears in Green as,
“Institute document added”, refer figure:5.
Once the institute document details are saved, all the added document information can be viewed at one place, at front–end in Data Table View, refer figure:6 – Data table View.
Data Table View Description:
Add New Document Tab:
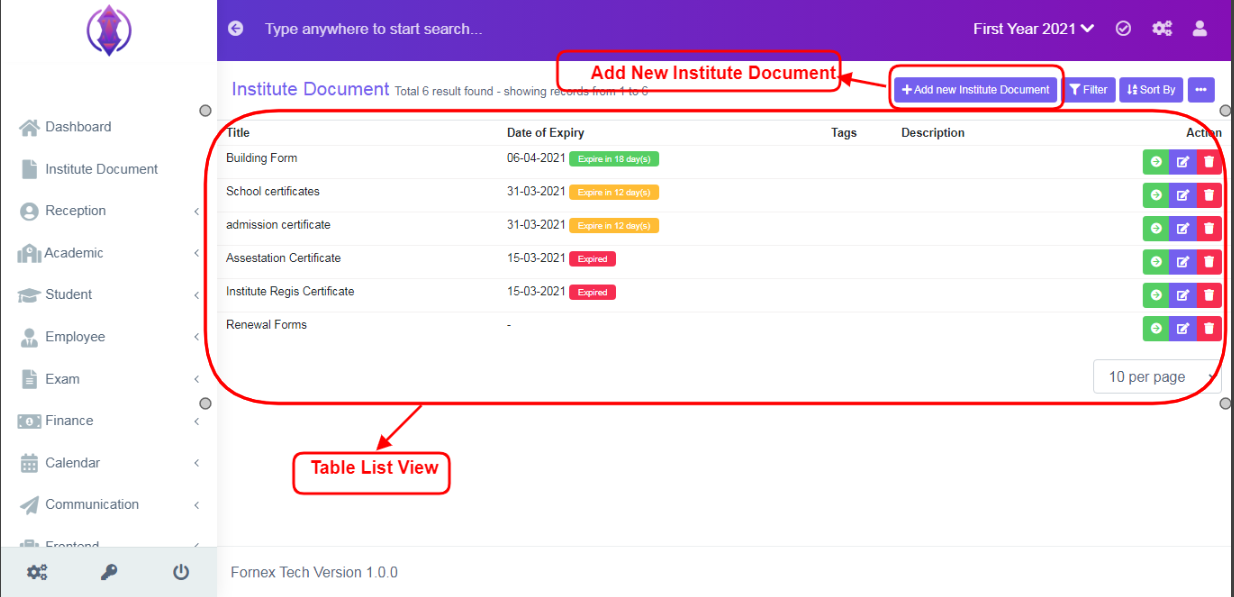
Figure 6If you have already added an institute document, from the middle of the screen, the Add New document tab, will get shifted to the top-right hand side of the page title bar. And the Data table View with different columns is displayed. Refer figure:6.
Date of Expiry Green Notification Bar:
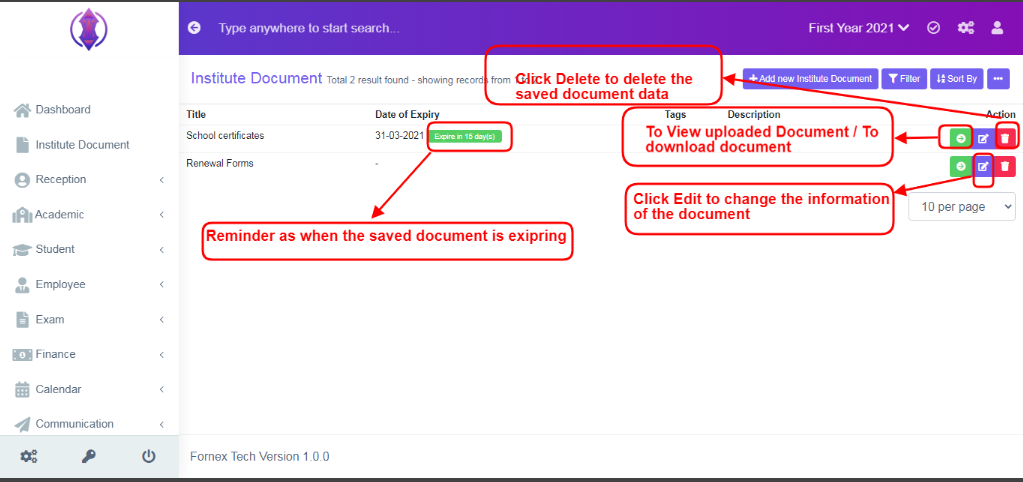
Figure 7
In the Data table view, in Date of Expiry Column refer figure:7, if Calendar date was selected while filling the form fields, it shows a Green Notification Bar – displaying the number of days left for the document to expire.
Ex: Displaying as “Expire in 15 day(s)”  as a reminder.
View Document:
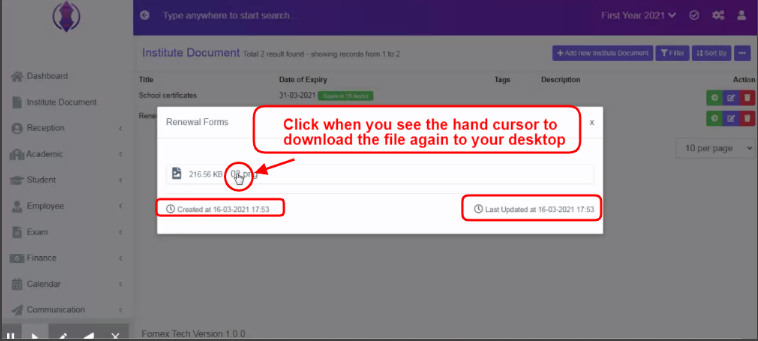
Figure 8
To View/Download the uploaded document , click  from the Actions, and you will get a popup screen, refer figure:7.
Refer figure:8, The document name will be displayed, along with created at and last updated at i.e. date and time information, at the bottom left and right of the pop up screen.
If you want to download the document again, please move your cursor above the name of the document, once you notice a “cursor hand”, refer figure:8, moving around, press click button, and a pop up save as box will open confirming it to save it on desktop. Click ‘Save’ of the pop up box and the document will get saved on your desktop.
Edit Document:
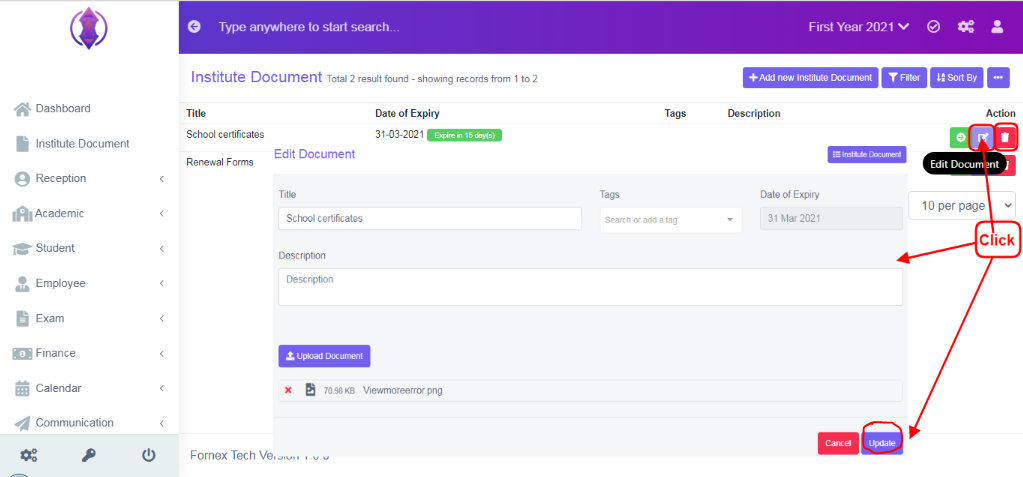
Figure 9
Refer figure:9, To edit the existing document click  icon and a screen will be displayed to Edit Document. Fill the required information, to do the changes to the form fields or to upload documents. Once done, click ‘update’, to save the changes. “Institute Document updated”, green popup screen will be displayed bottom right hand side of the screen.
Delete Document:
If you want to delete , the saved document details and attached files, forever, click delete icon and a pop up screen comes up, asking for your confirmation  to proceed with the request, click
 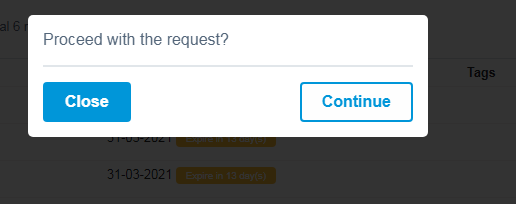 , continue, if you want to delete the data or click close to go back to the table list view. Data will get deleted from the database and it cannot be retrieved again.
You can use Filter Fields, Sort By List and More Options, Print and Generate PDF, to view and print the displayed table list view data according to your requirements.