Filter, Sort By & More Options Description
Filter Fields Description
- — Keyword
- — Expired
- — Expiring in(Days)
Sort By Lists Description
- — Ascending & Date of Expiry
- — Descending & Date of Expiry
- — Ascending & Title
- — Descending & Title
- — Ascending & Created at
- — Descending & Created at
More Options Description
- — Print Option
- — Generate PDF
Filter Fields Description:
Keyword:
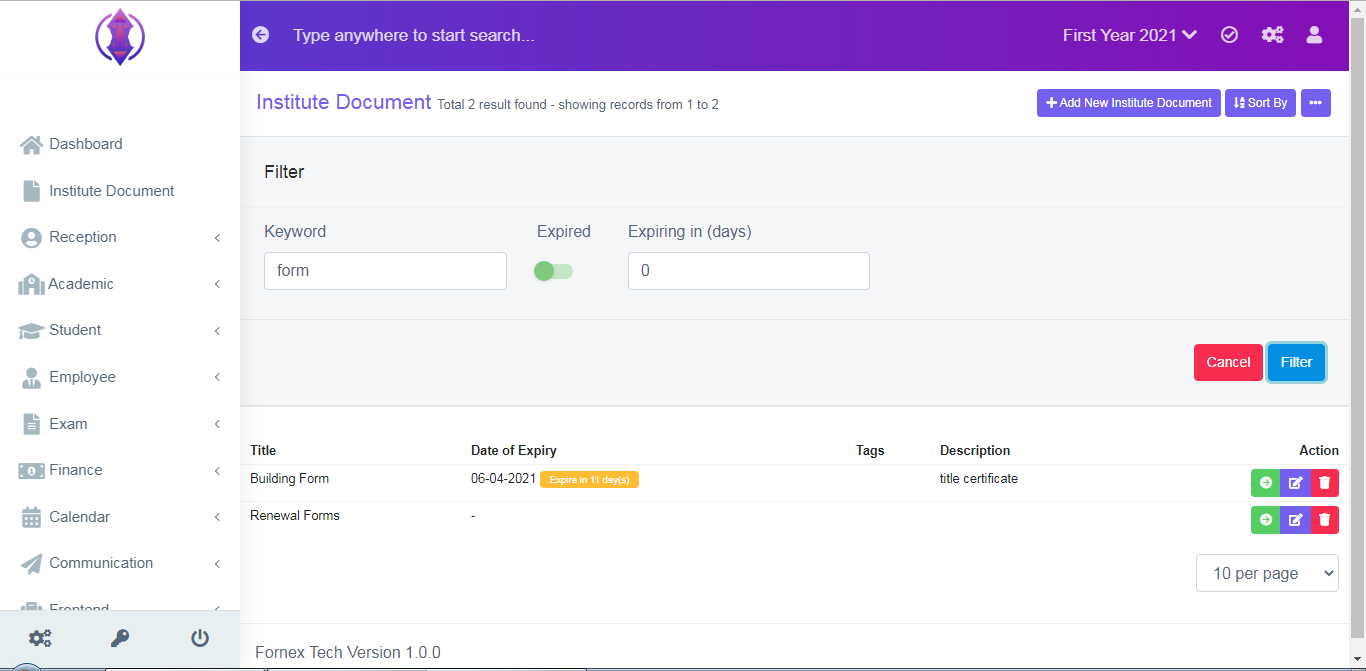
Figure 10It is used to filter the keywords of the title of the document's name. Enter the word, you want to filter, Ex: school, or forms, and click ‘Filter’, and the entered word will be displayed, in the data table view below the filter screen.
Expired:
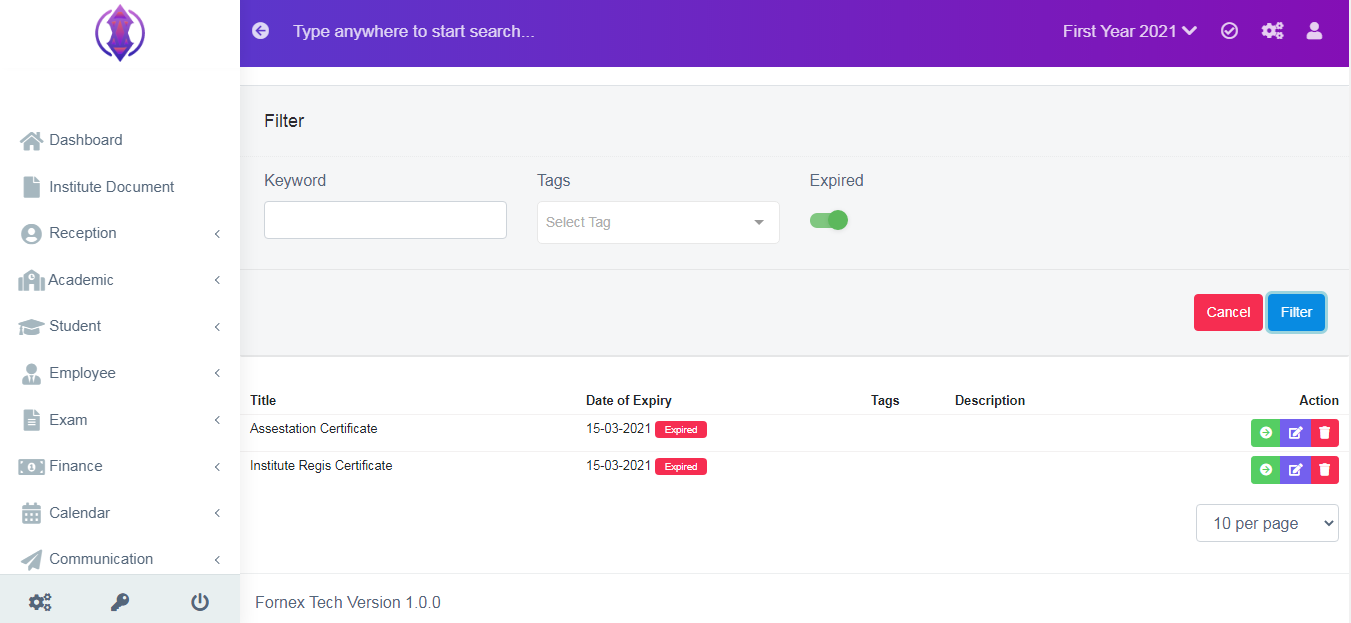
Figure 12
It is used to Filter the expired documents. If the dot filled circle is at the left side,  it is disabled and if you click on it and the dot filled circle is at the right side
  it is Enabled. If you enable it and click "Filter", all the expired documents will be displayed in the data table view. Refer figure:12.
Expiring in (days):
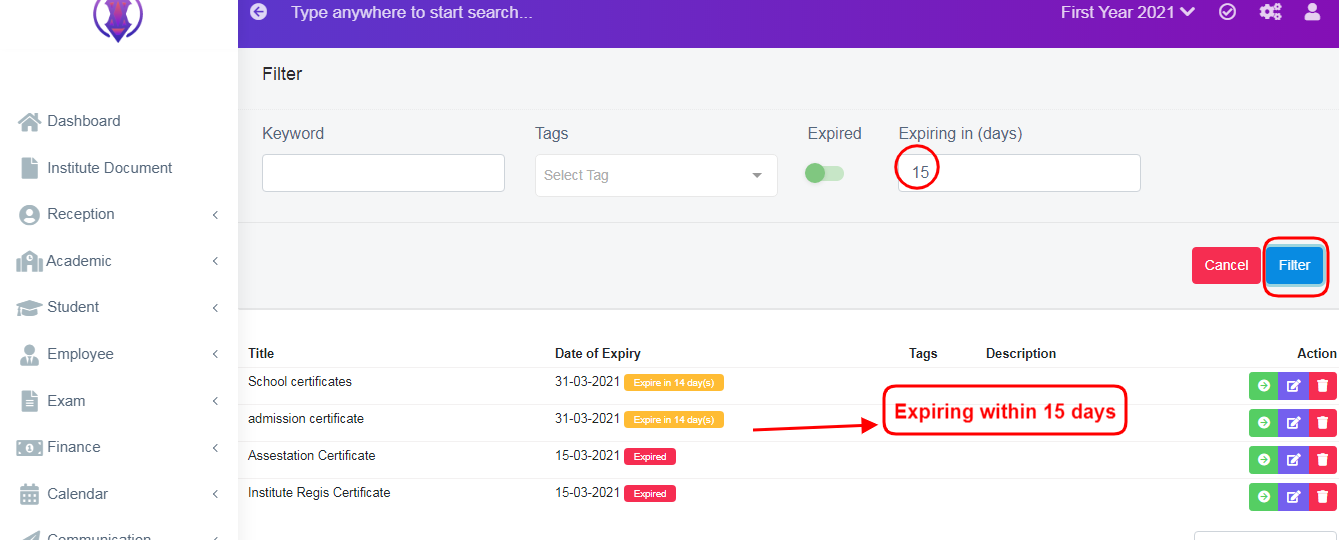
Figure 13
It should be left as 0 or empty, if you want to refer to the complete list view. And if you want to know, the documents which are going to expire soon.
Ex: which are going to expire in next 15 days, enter 15 In the expiring in days  and click ‘Filter’, all the expired document, plus the documents which are going to expire within 15 days will be displayed in data table view. Refer figure:13.
Sort By Lists Description
Ascending & Date of Expiry:
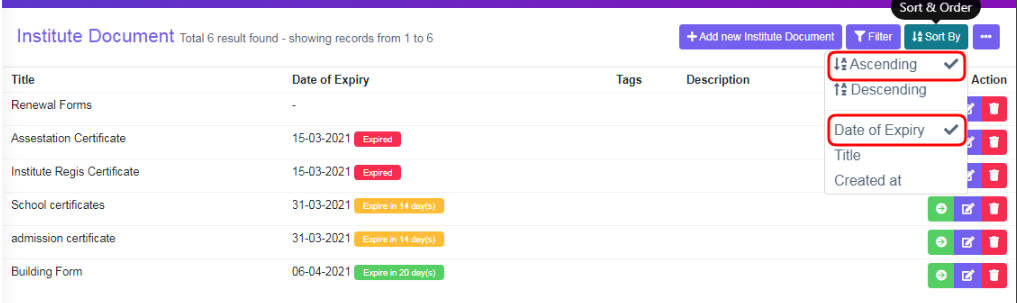
Figure 14Selected Ascending and Date of Expiry it will list, passed, present and far dates of expiry of documents in order. Refer figure:14.
Descending & Date of Expiry:
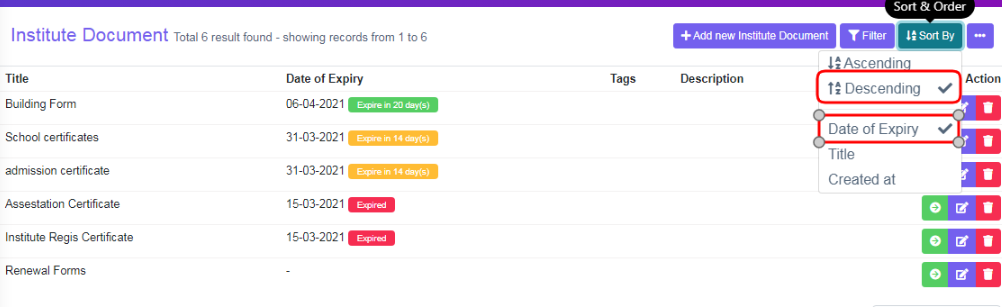
Figure 15Selected Descending and Date of Expiry it will list, Far, present and passed, dates of expiry of documents in order. Refer figure:15.
Ascending & Title:

Figure 16Selected Ascending & Title, it will list, documents, in A to Z, alphabetical title name in order. Refer figure:16.
Descending & Title:
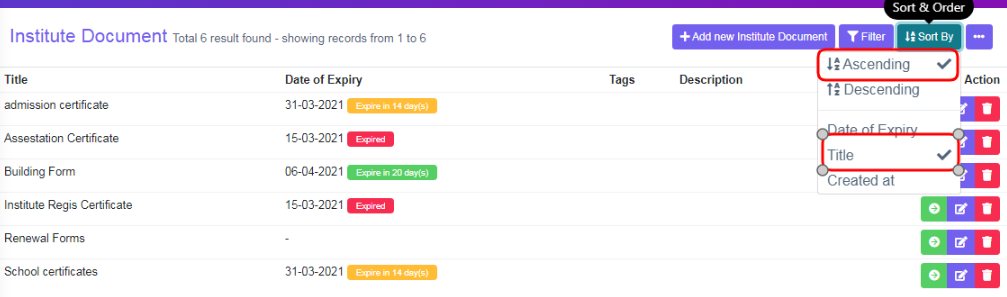
Figure 17Selected Descending & Title, it will list, documents, in Z to A, alphabetical title name in order. Refer figure:17.
Ascending & Created at:
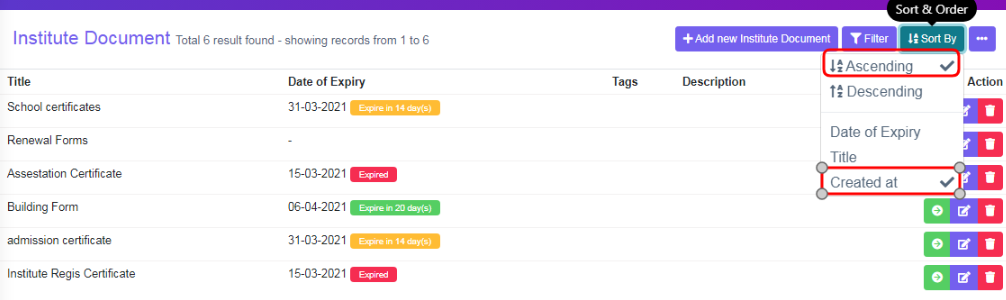
Figure 18Selected Ascending & Created at, it will list. Documents, which were created oldest to newly added, created date in order.Refer figure:18.
Descending & Created at:
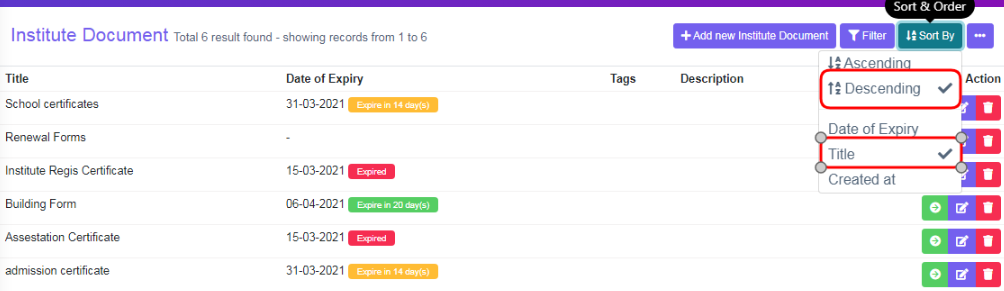
Figure 19Selected Descending & Created at, it will list. Documents, which were created recently to the oldest added created, date in order. Refer Figure:19.
More Options Description
.png)
Figure 20The three dots tab contains two options, Print and Generate PDF.
Print Option:
0.1.png)
Figure 21To print the data table view data, click ‘Print’, this will Open a new page, listing table view data, to Print. Refer figure:21
0.2.png)
Figure 22To print more specific data, ex: all documents having word “form”, use filter option and then use print option, only filtered data will be listed in the new tab to print. refer figure:22
Generate PDF:
0.3.png)
Figure 23To download PDF to the desktop, click ‘Generate PDF’, a pop up save as box will open confirming it to save it on desktop. Click ‘Save’ of the pop up box and the pdf will get saved on your desktop. Refer figure:23. You can also use filters, to export more specific data in pdf.